Create Pipeline in Oracle GoldenGate Free with Connection - Step by Step Details
GoldenGate Free is available to everyone, Whether you are a beginner in to data replication trying to understand the fundamentals without incurring additional expenses or spending excessive time on setup and configuration, GoldenGate Free is the perfect solution for you.
Used Cases of GoldenGate Free are for Development or Test Environment. For databases of 20GB or smaller. This can also be used in Training and for Learning Environment. The supported replication for this free instance is limited to Oracle to Oracle, specifically from version 11.2.0.4 to 21c.
This blog describes step by step in detail on how to Create Pipeline In Oracle GoldenGate Free along with the connection details for simple Replication. About provisioning the GoldenGate Free instance you can check my other Blog
GoldenGate Free in Docker Container.
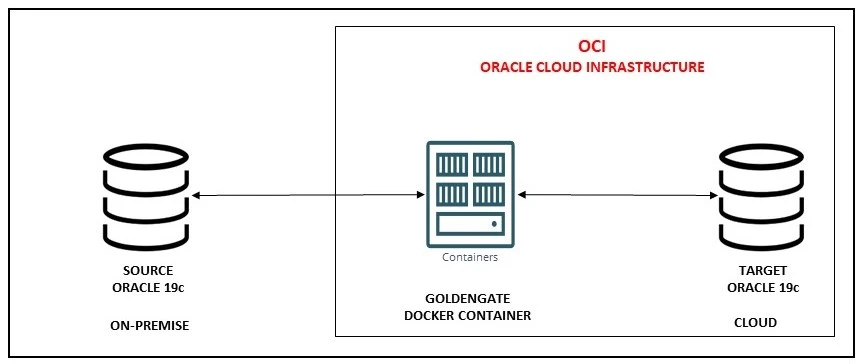
sAMPLE ARCHITECTURE
CREATING CONNECTIONS
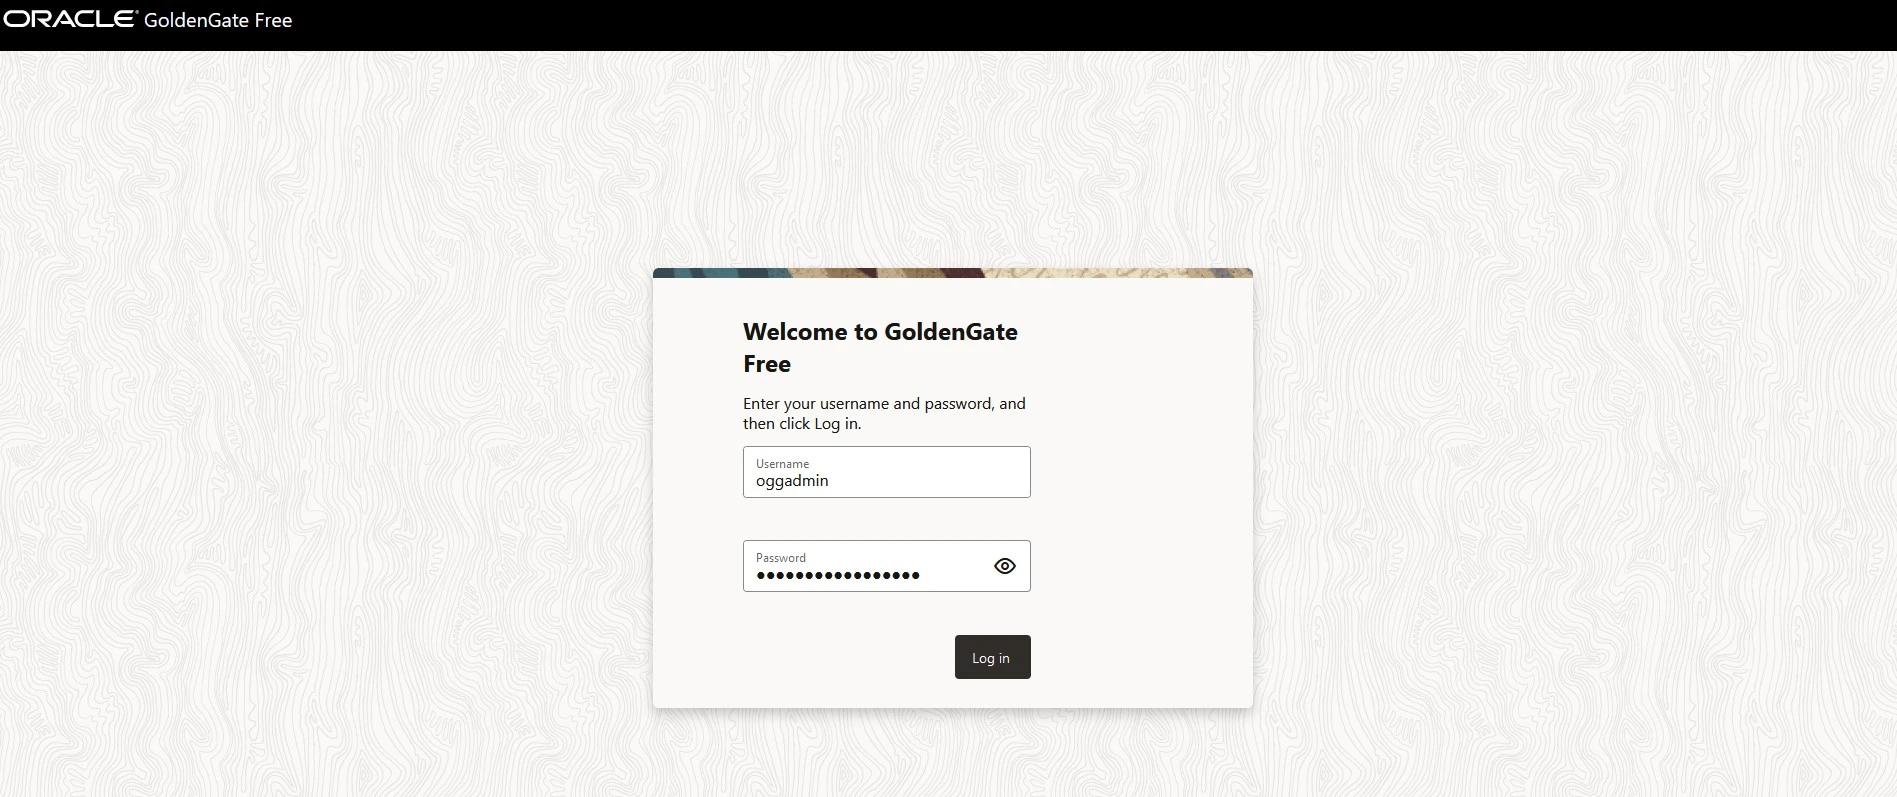
After provisioning, access the GoldenGate Free Instance Home by logging in using the IP Address.
Click on Create Connection, you will be able to view a screen that looks the one shown below.
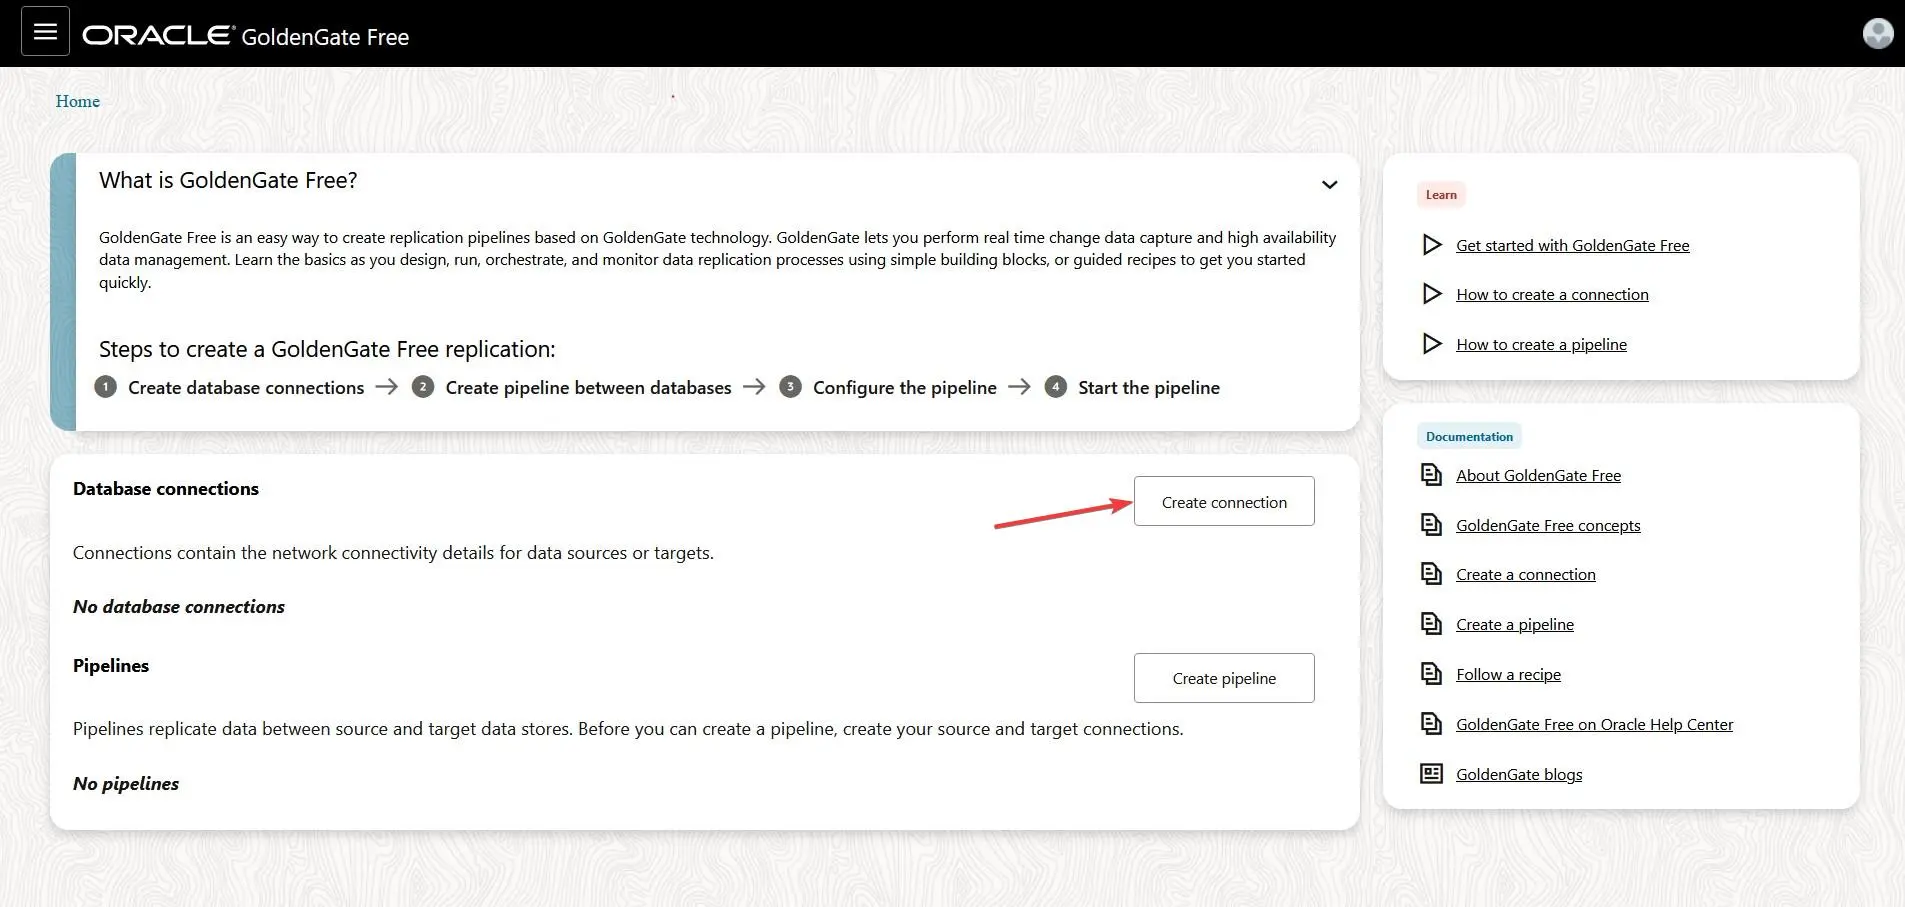
Click on Create Connection, you will be able to view a screen that looks the one shown below.
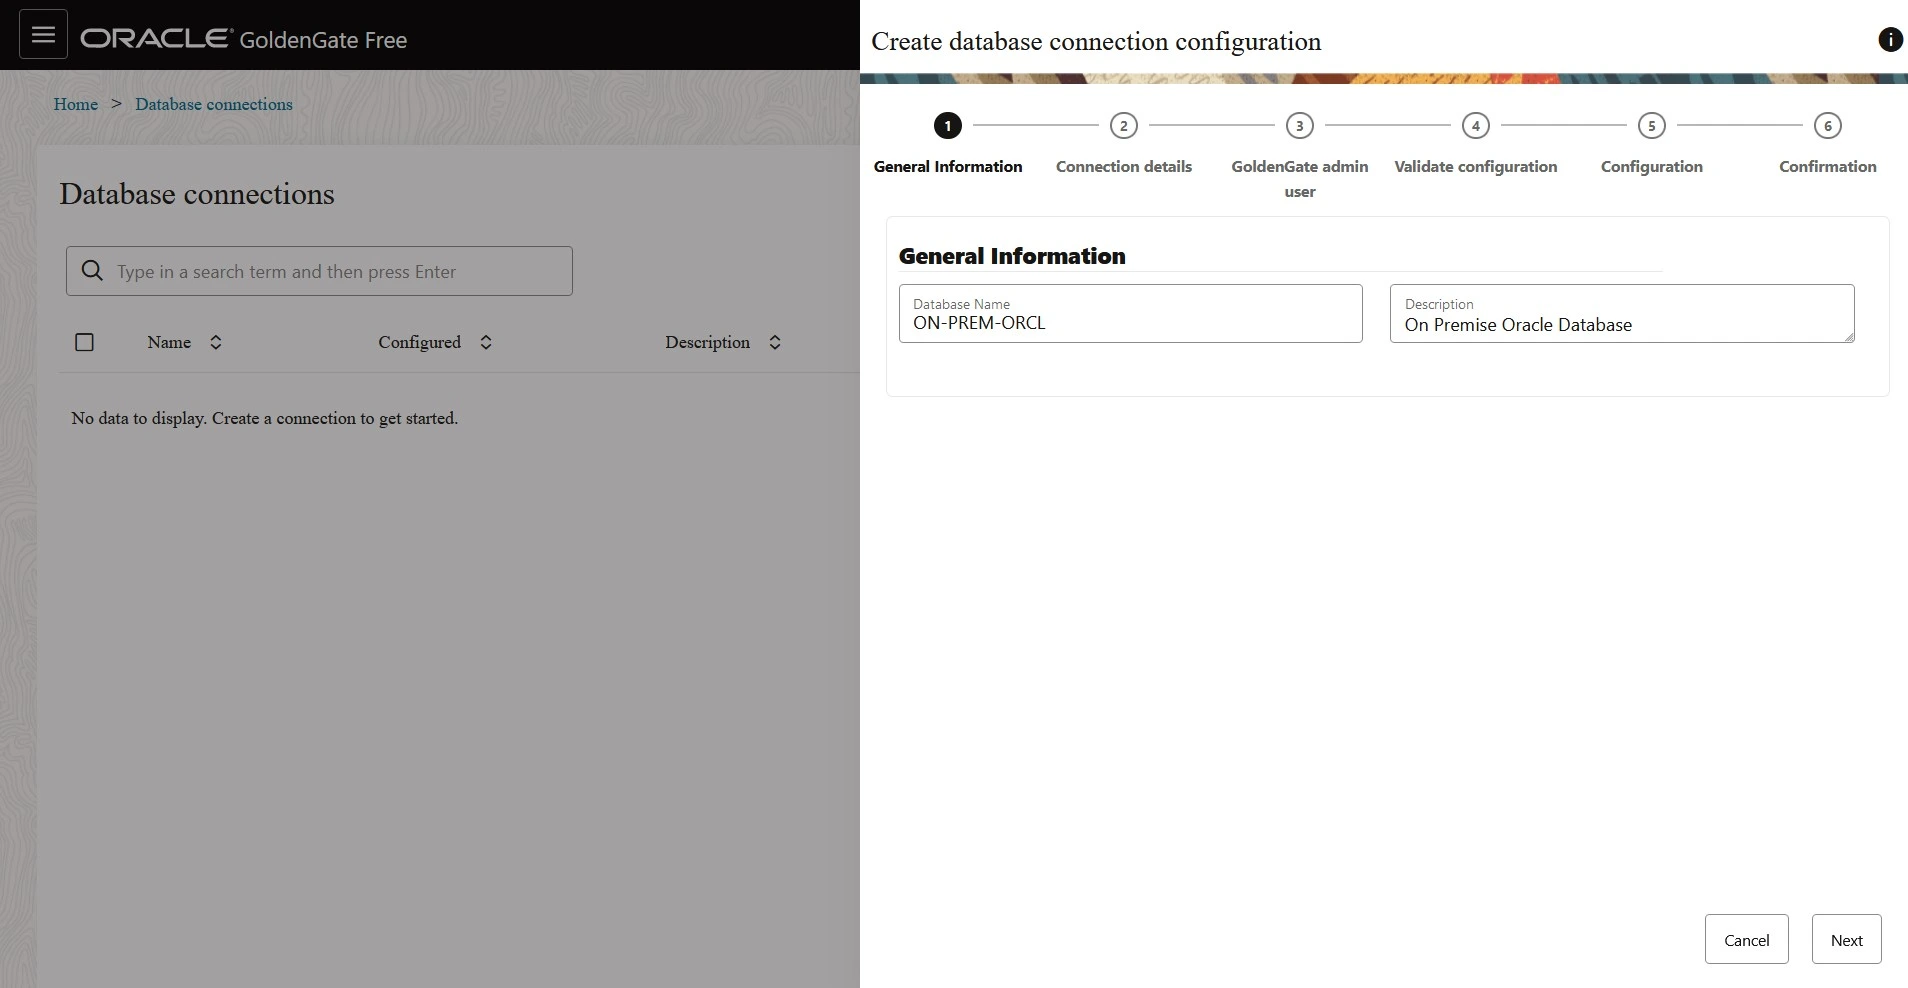
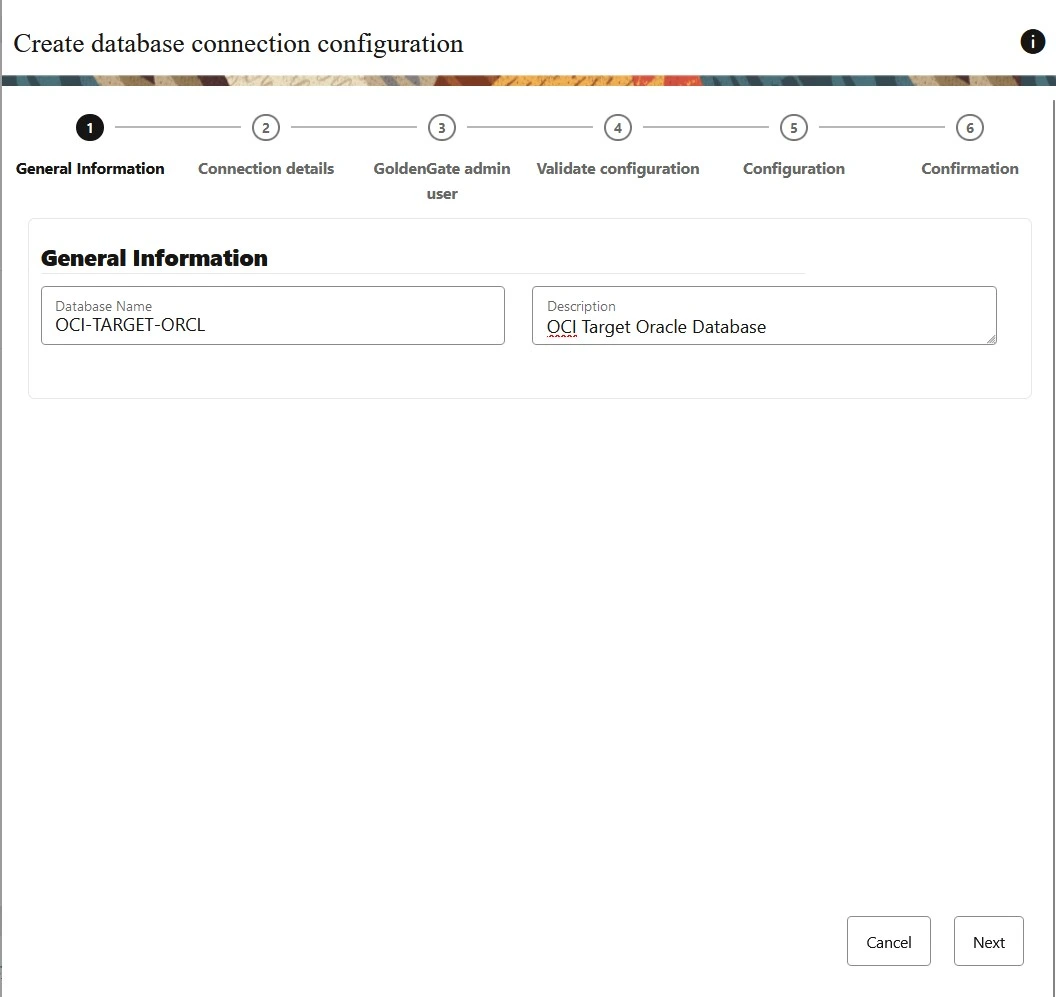
Fill in the Database Name and Description.
Fill in the Database Name and Description.
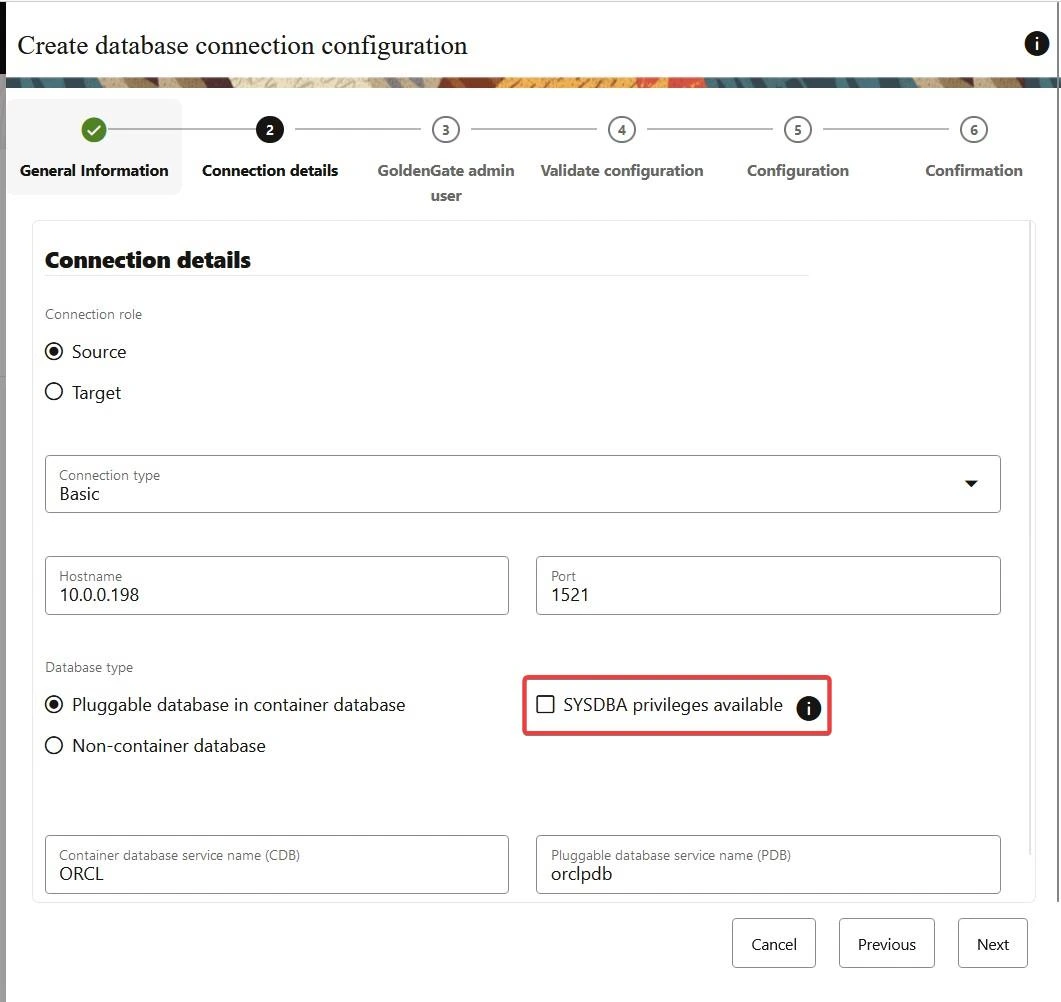
Select the connection as Source and pluggable database or non container database based on your source DB Configuration. If you have an access to sys user select the check box of sysdba privileges.
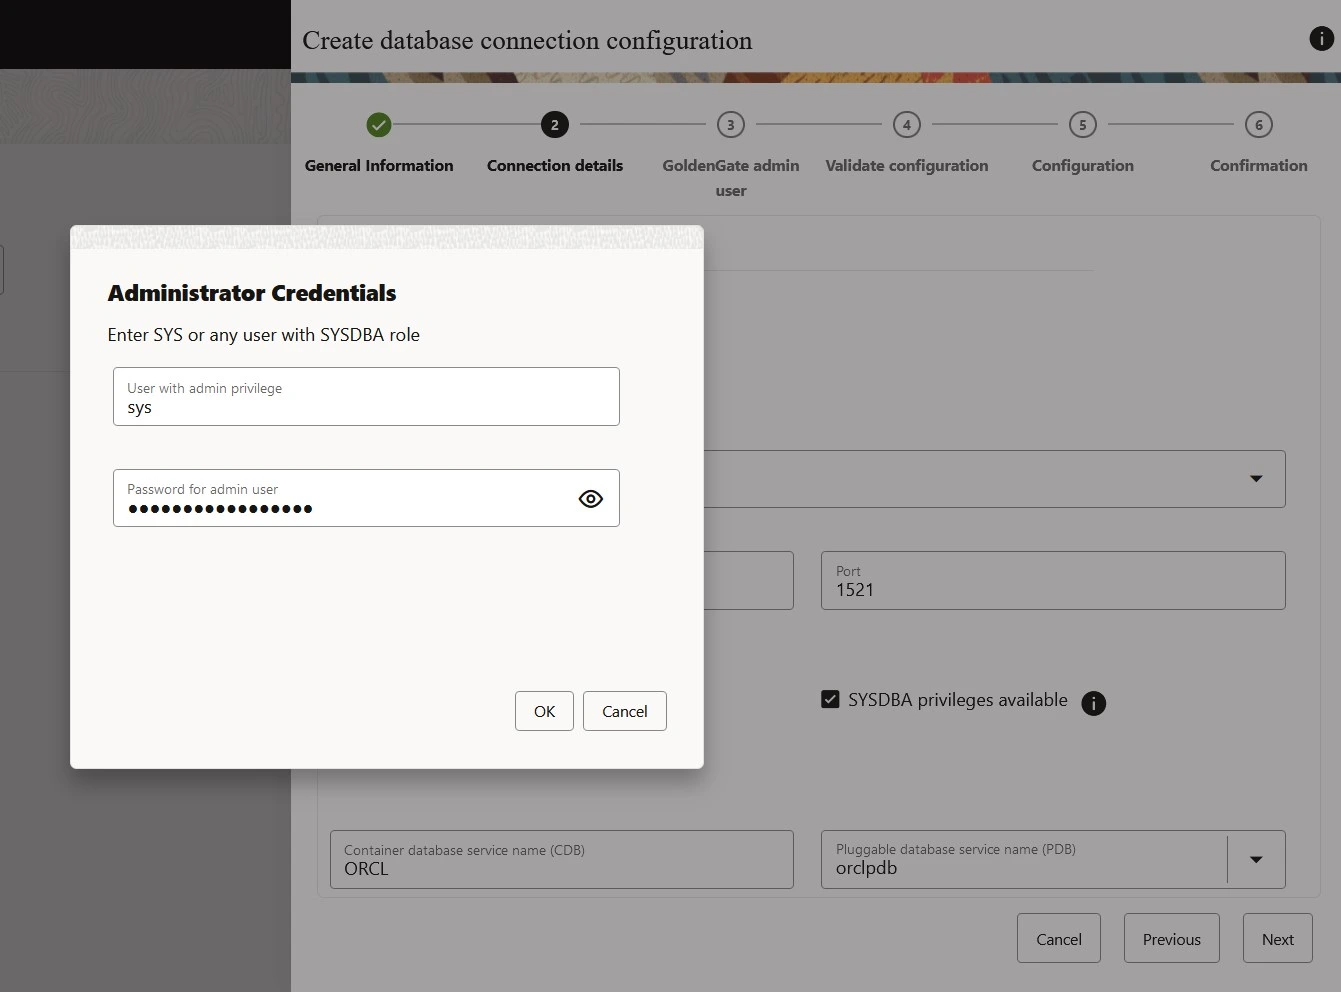
Enter the sys user and password.
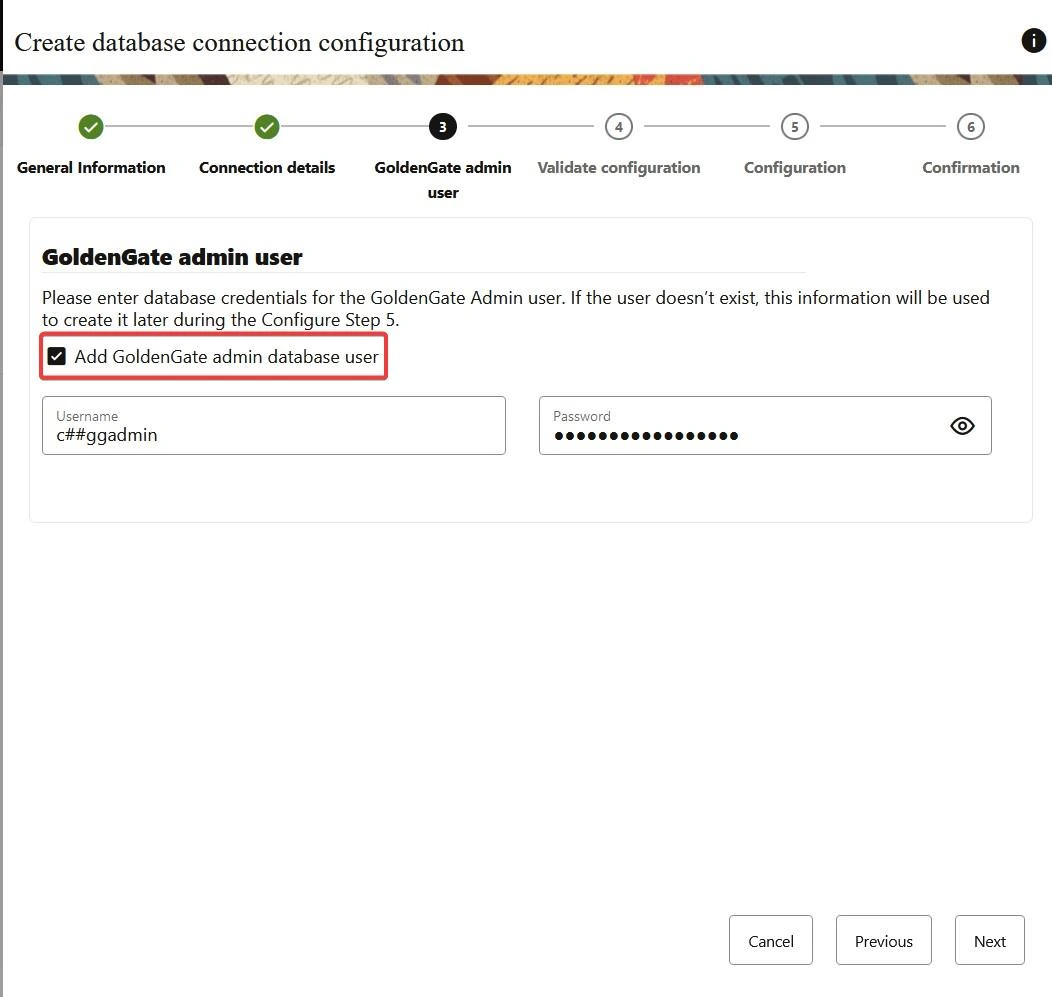
Enter the source database user ID. If it is container database then the user should be a common user like c##ggadmin.
For Non container you can create normal user like ggadmin
Click on Run Analysis to validate the source database.
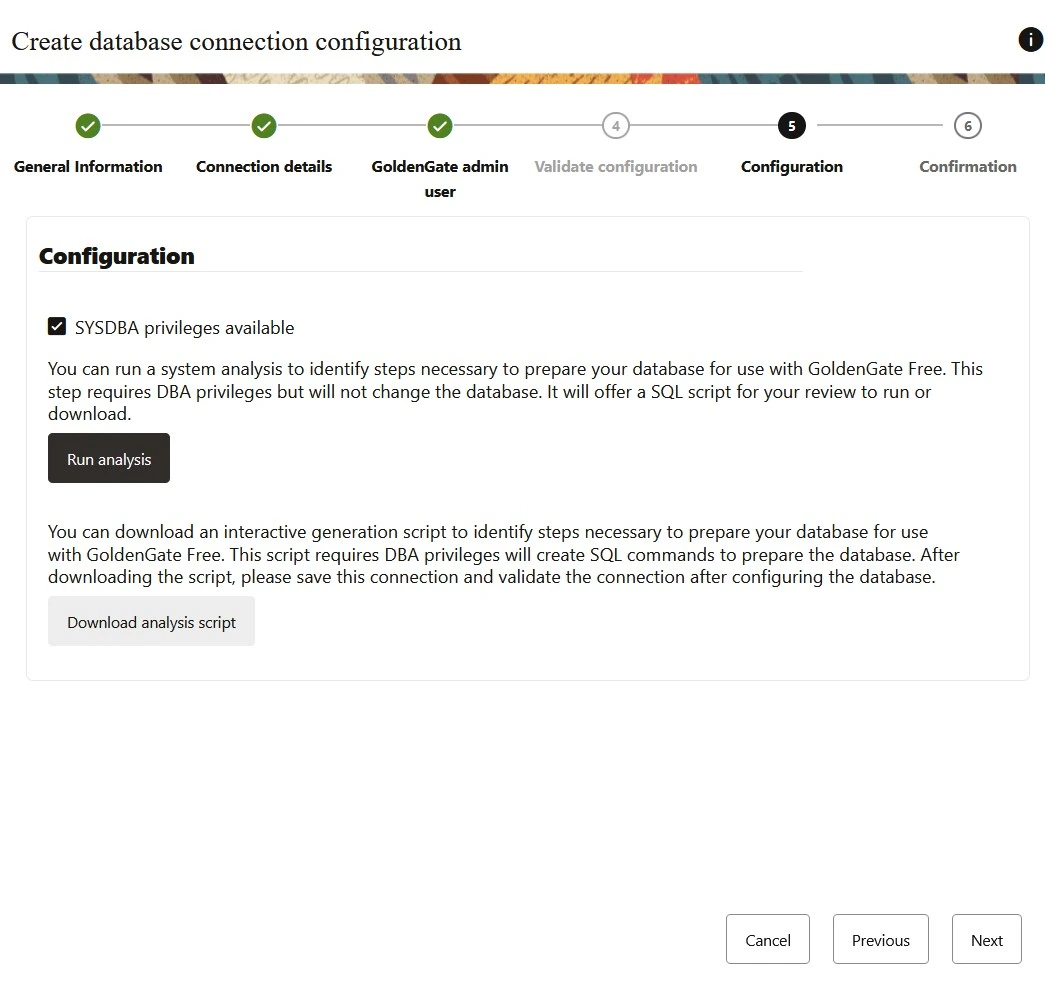
After reviewing the script output either you can download the script or click on Run SQL.
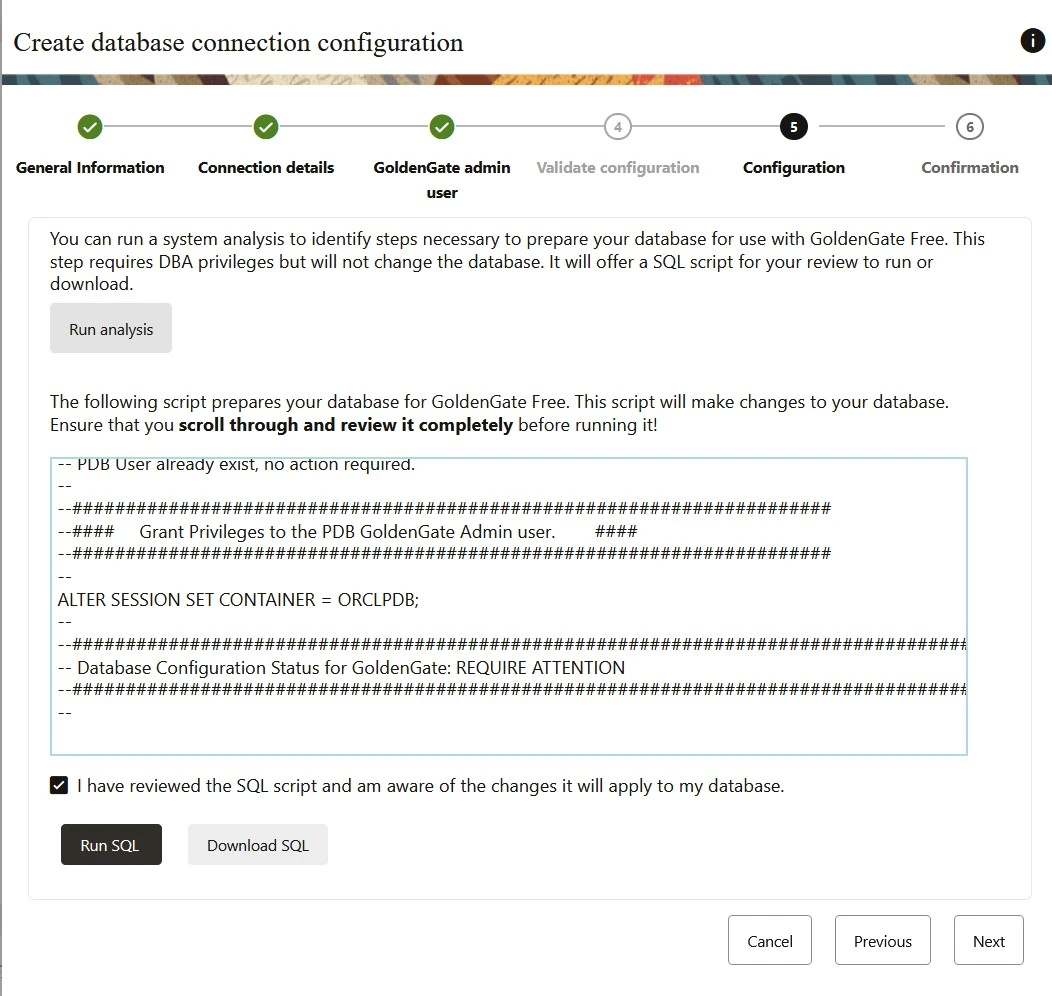
Click on Create button to complete the source database configuration.
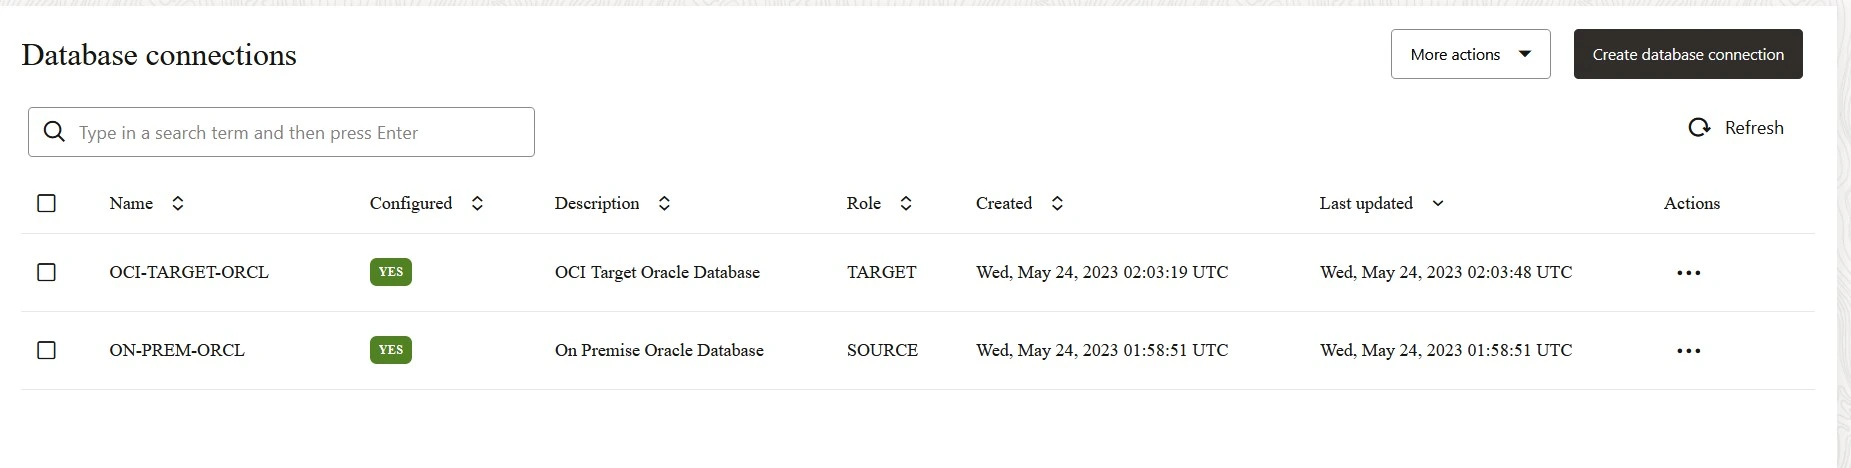
Once completed you could see the GREEN YES stating the connection to source database is successful.

Now lets create the Target Database Connection. Here in this case the target database is OCI DBCS.
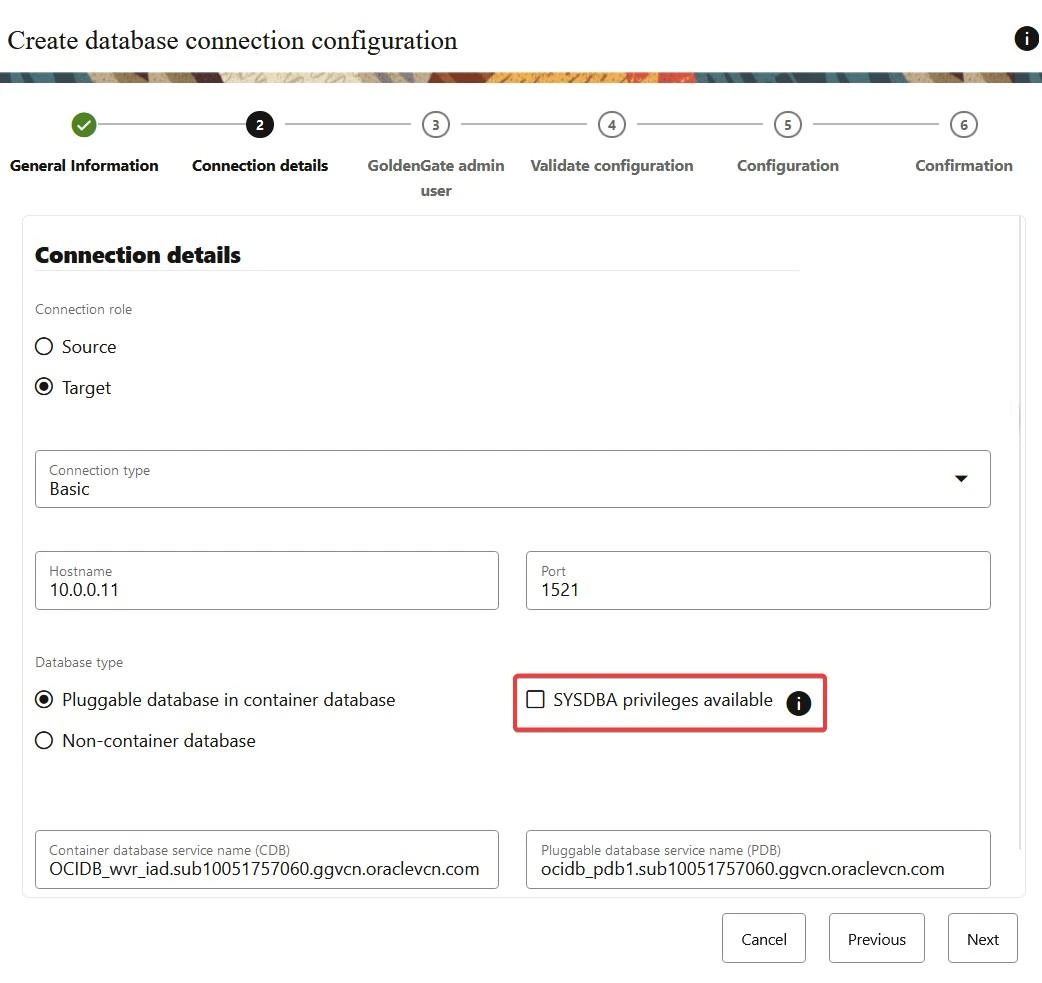
Select the connection details as Target. Enter the Host Name, PORT details and click on sysdba privileges.
Also add in CDB + PDB Information.
Enter the sys and password for admin user.
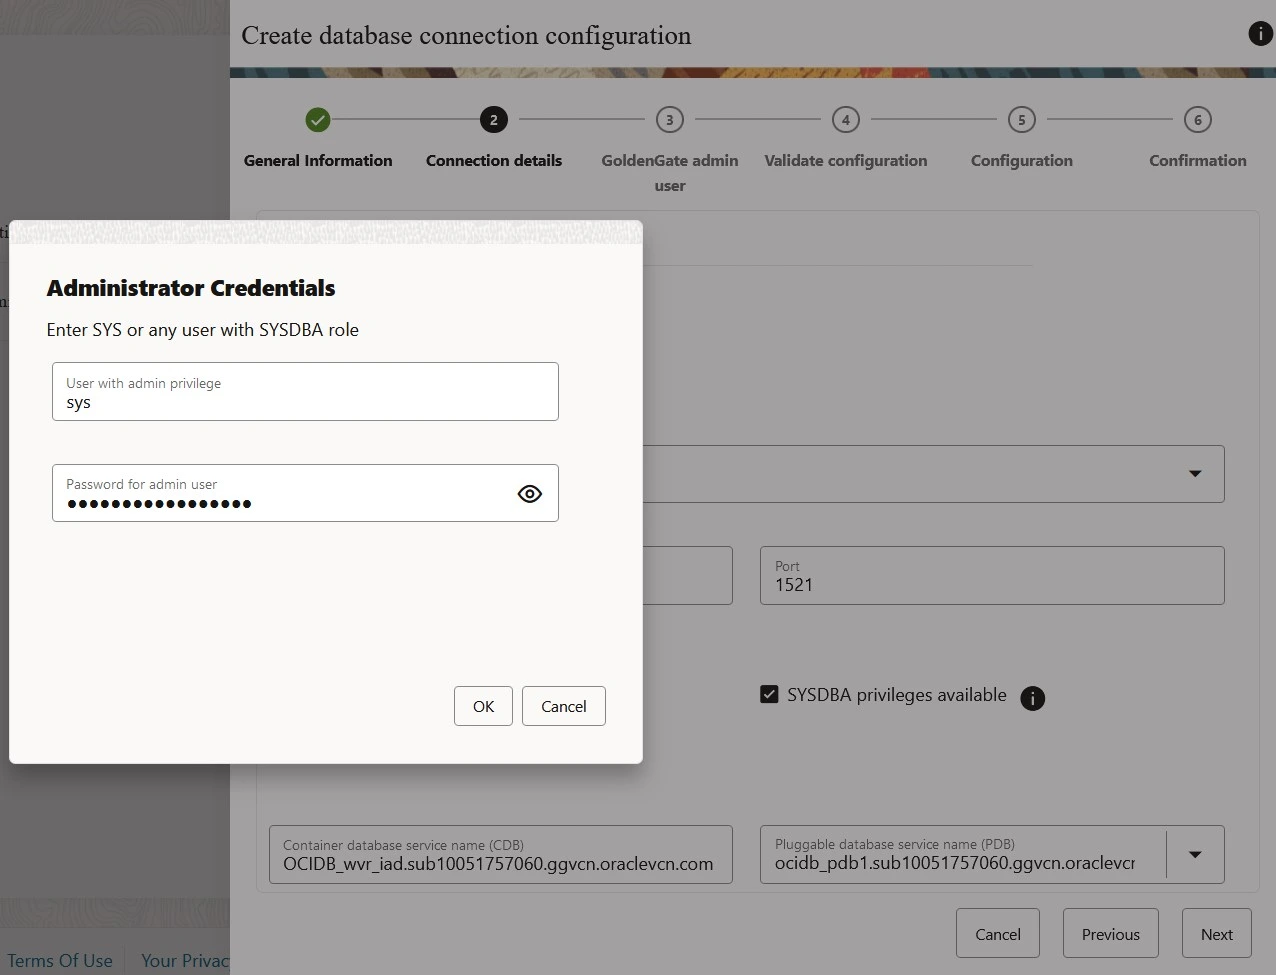
Input the target GG admin username. Since this is replicat you need to enter PDB user here and not the CDB user.

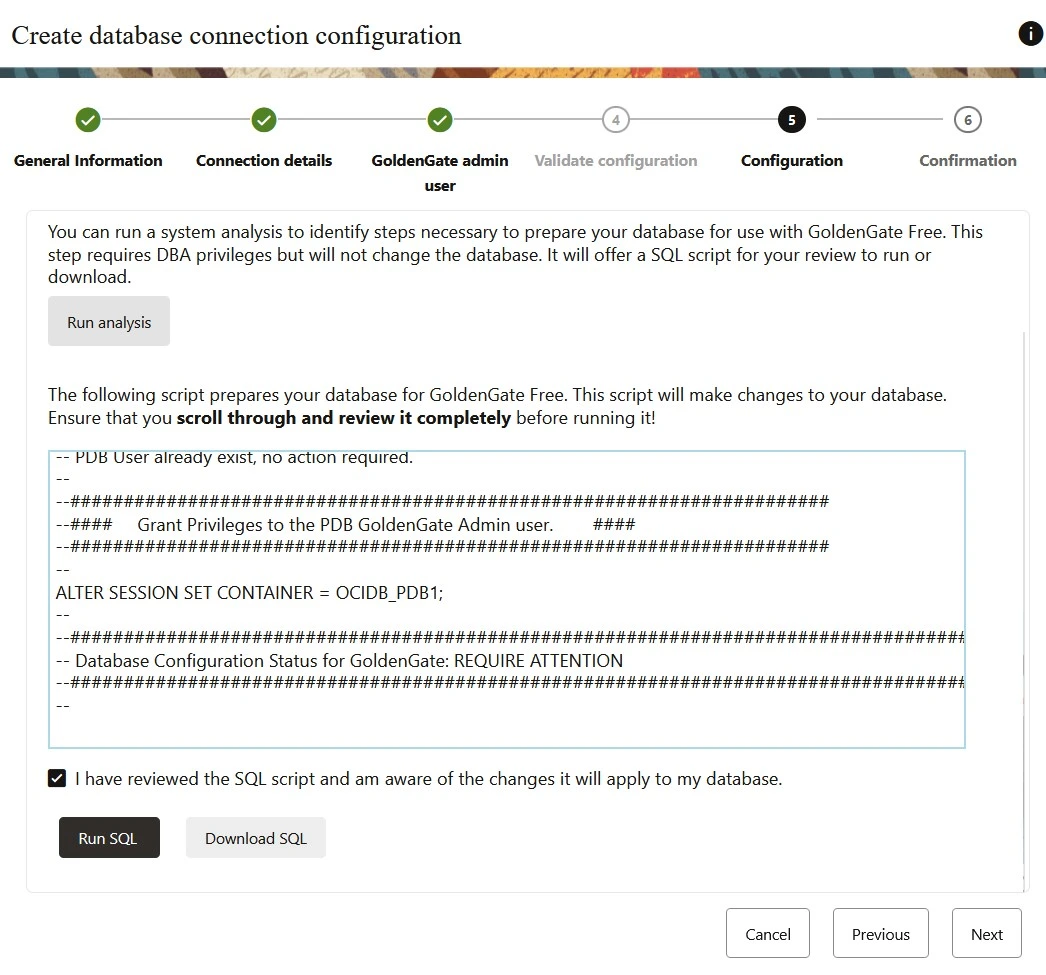
Run analysis, validate the sql code and Run SQL
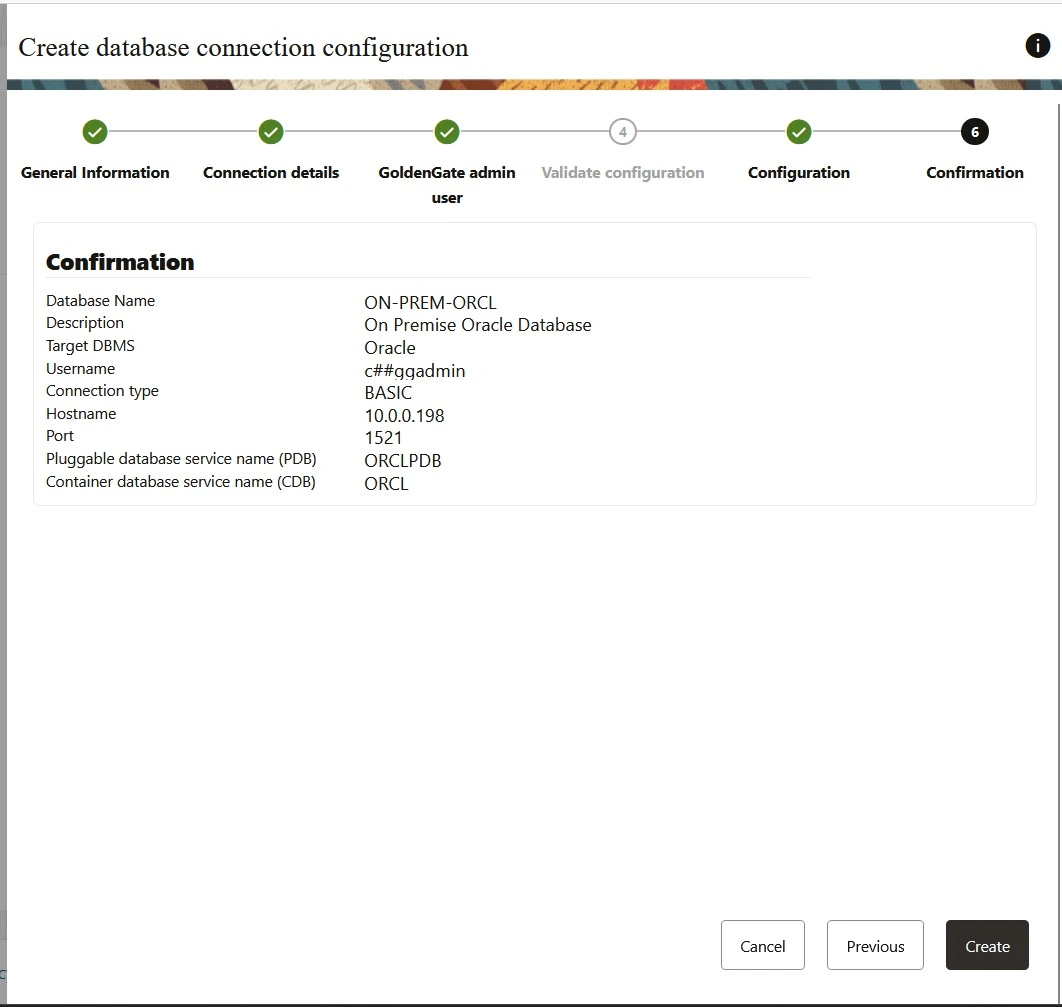
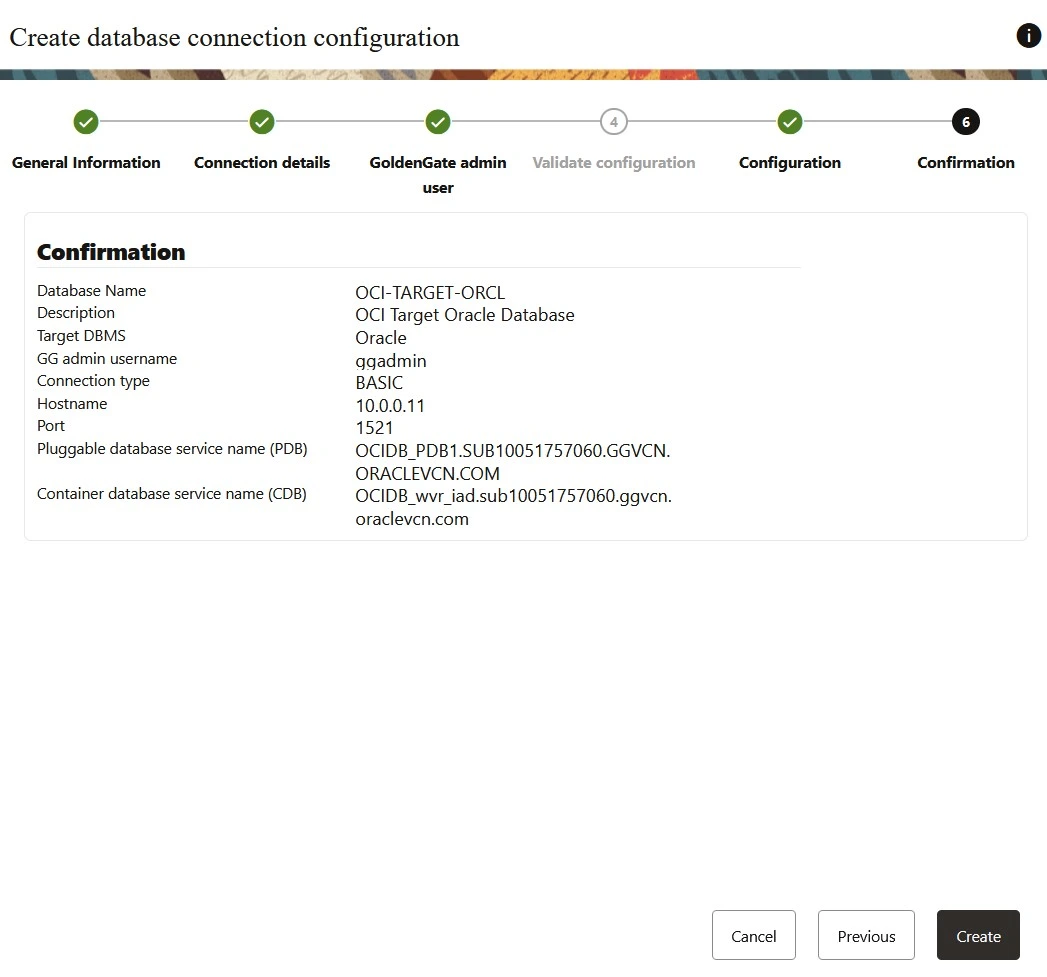
Click on Create Database configuration to complete the Target connection.
After creating Source and Target Connection the final screen should look like below.
CREATING PIPELINES
After creating connections successfully, the next process is to create the pipeline.
The process of replication has been made simpler in this light weight tool of GoldenGate Free version. Here there is no need to create separate extract and replicat components as it will be created while creating the pipeline. Create a pipeline consisting of a source and a target, and configure the mapping options in one centralized location in turn that will create Extracts and Replicats.
The process of replication has been made simpler in this light weight tool of GoldenGate Free version. Here there is no need to create separate extract and replicat components as it will be created while creating the pipeline. Create a pipeline consisting of a source and a target, and configure the mapping options in one centralized location in turn that will create Extracts and Replicats.

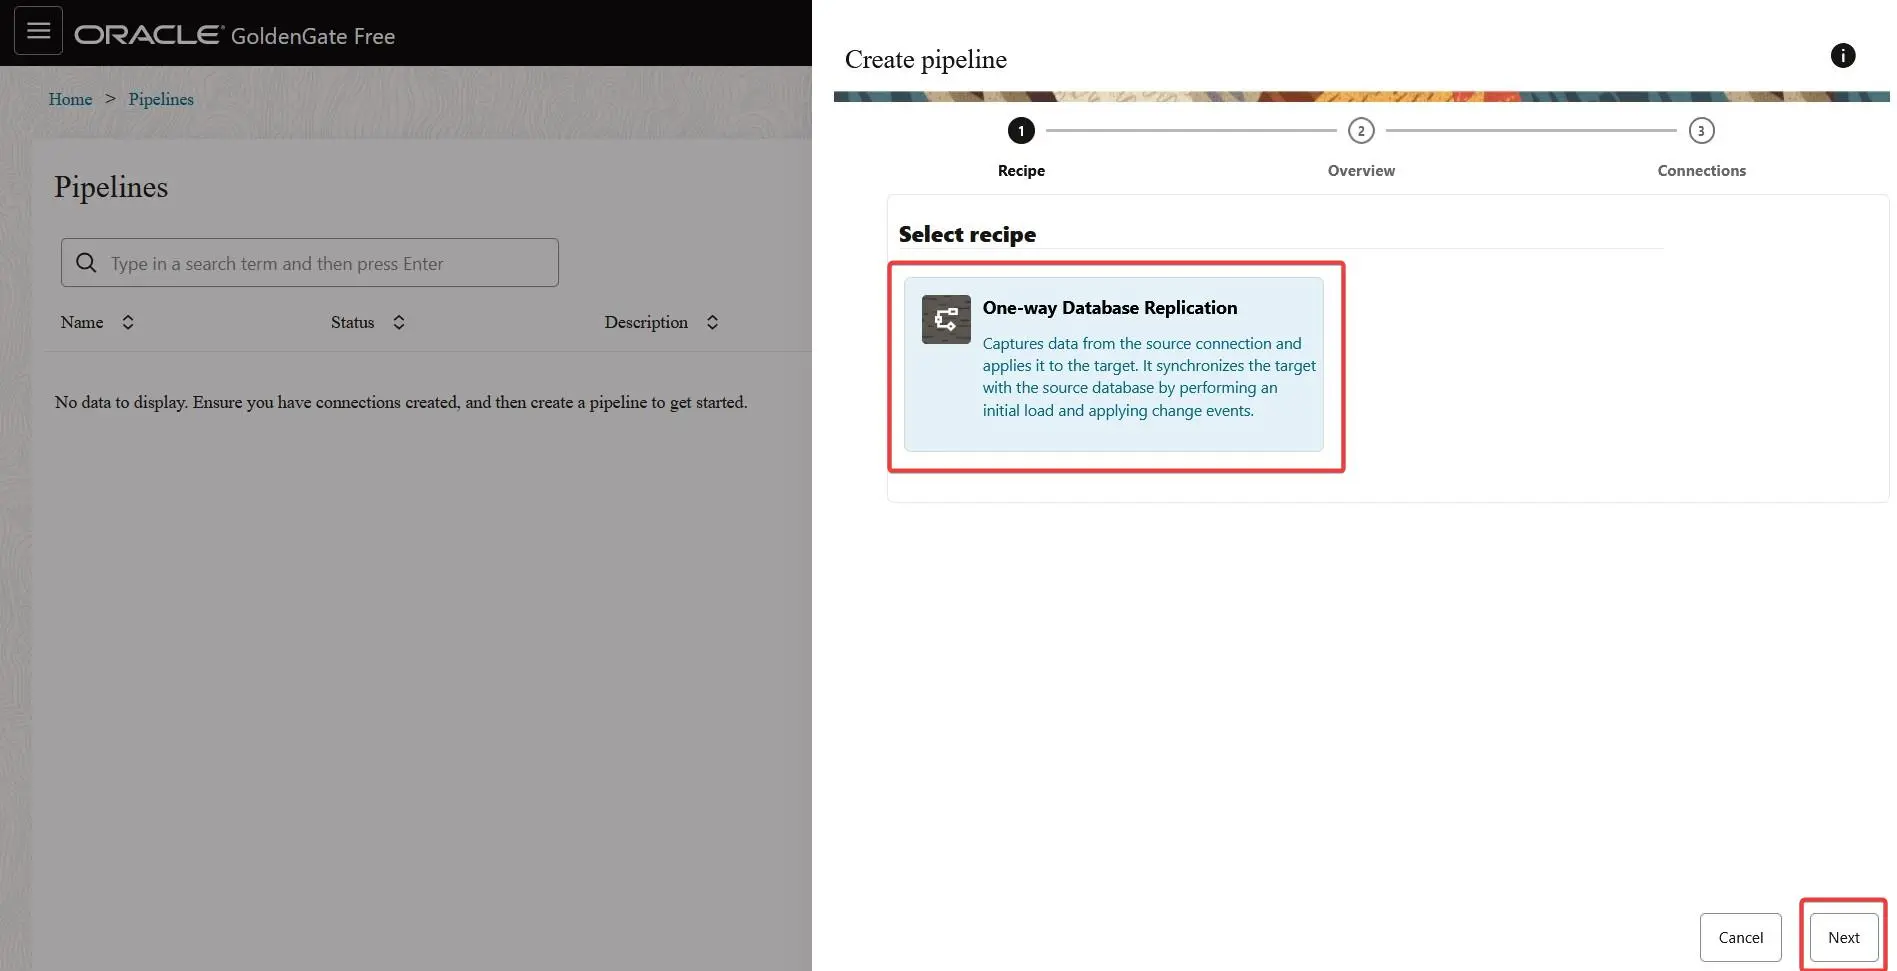
Click on Create Pipeline. At present it supports only one way Replication.
Enter the Name for Pipeline and provide the Description for the same.
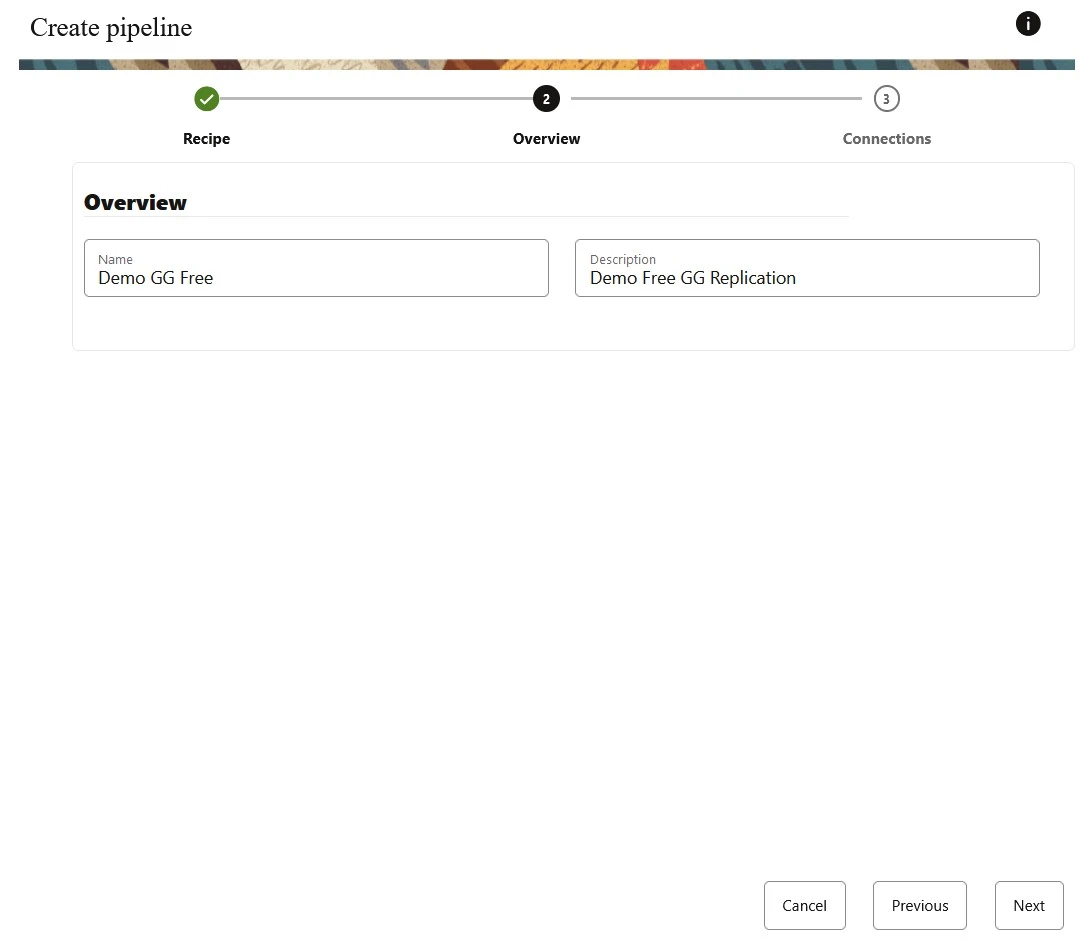
Select the SOURCE Database and TARGET Database connection as it was created during connection wizard.
Click on Save & Configure.

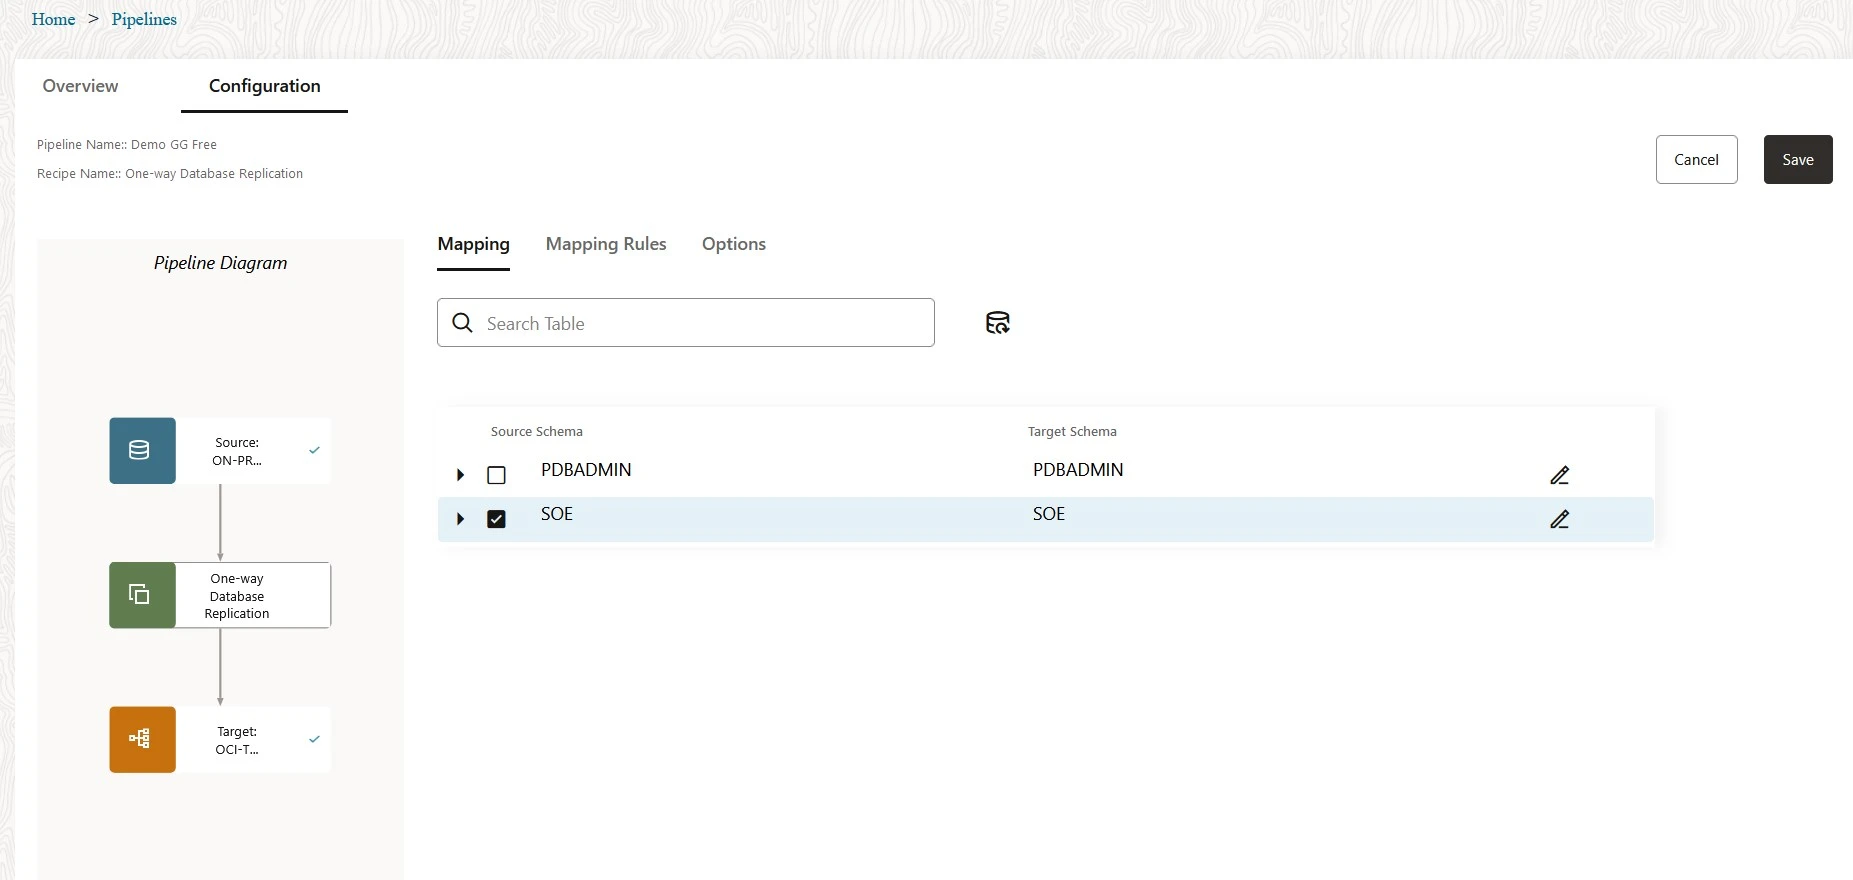
After successful creation of pipeline you can configure the Mapping i.e. select the tables you want to replicat.
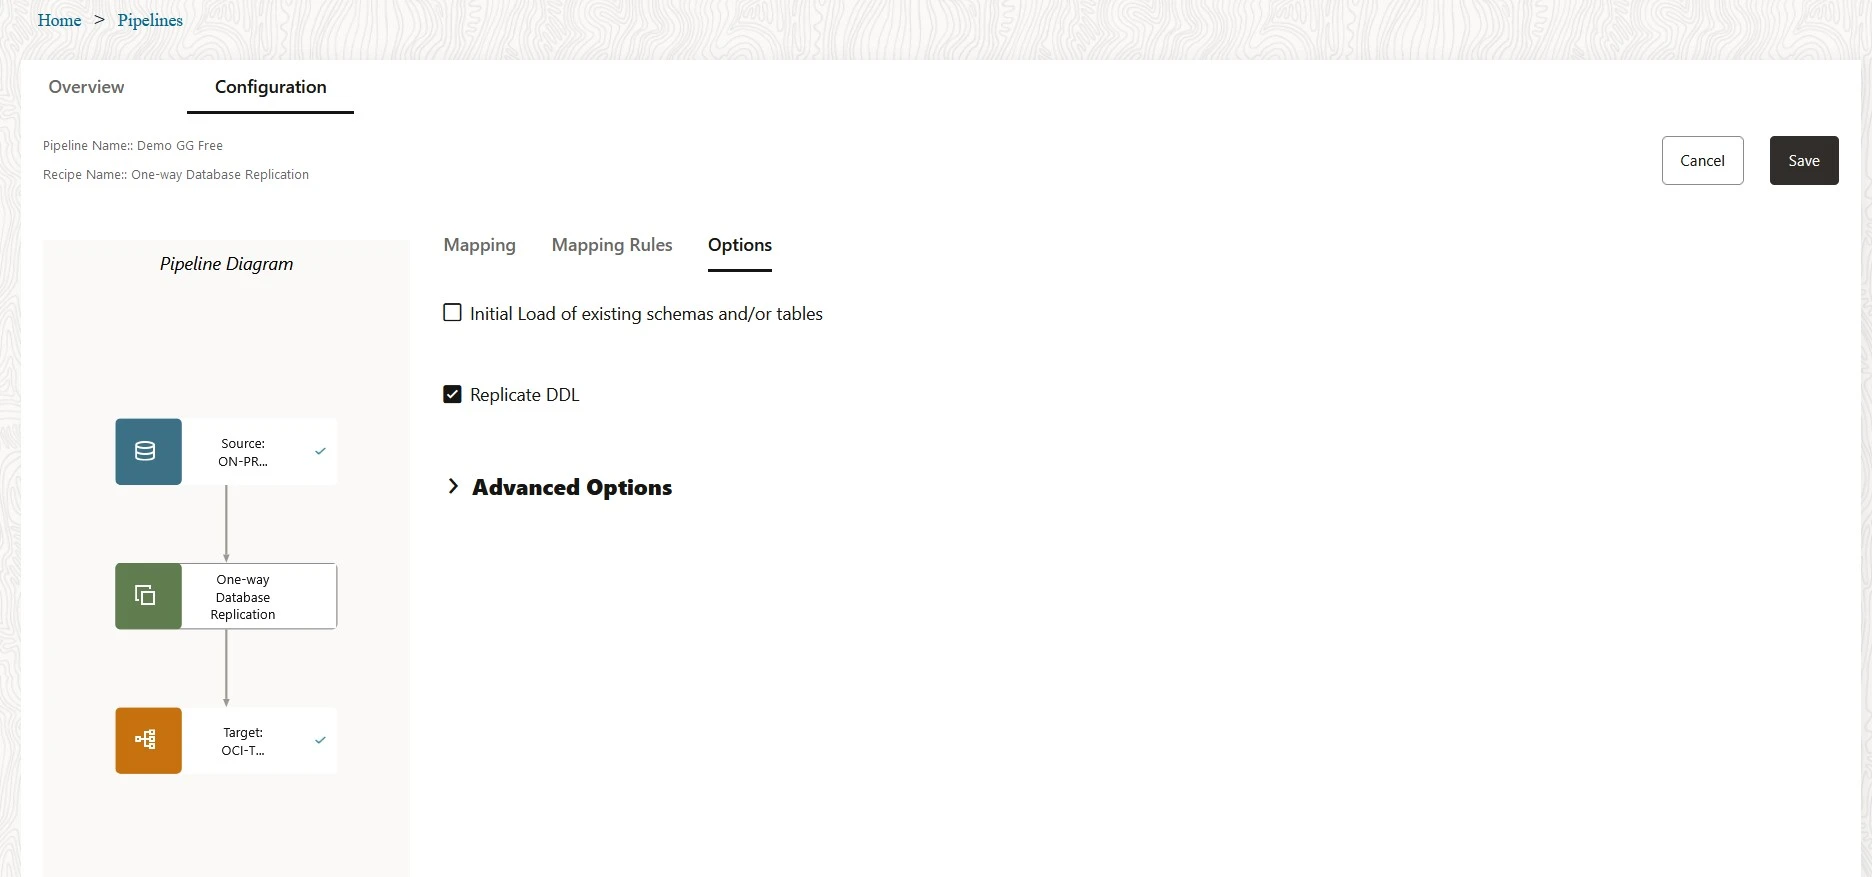
In the configuration you can select the check mark to do the Initial Load and Replicat DDL based on your requirement.
Click on Save after the changes.
Click on Save after the changes.
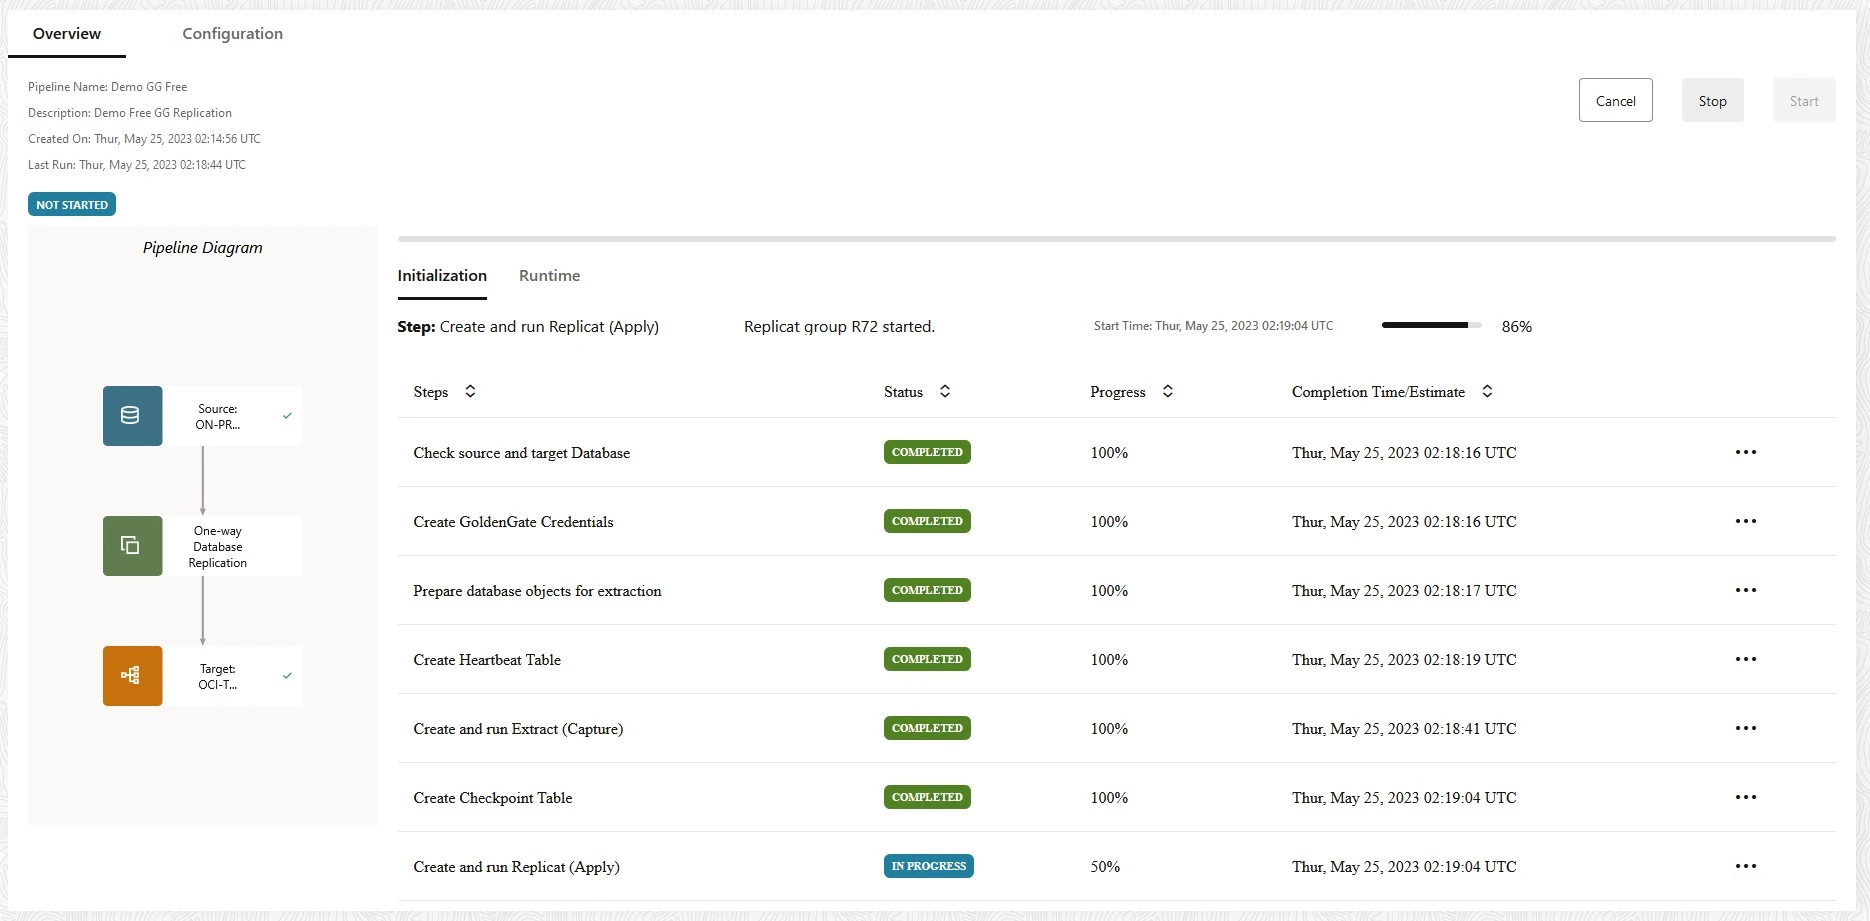
Click on the Start button to initiate the replication. Below is the sample screenshot.
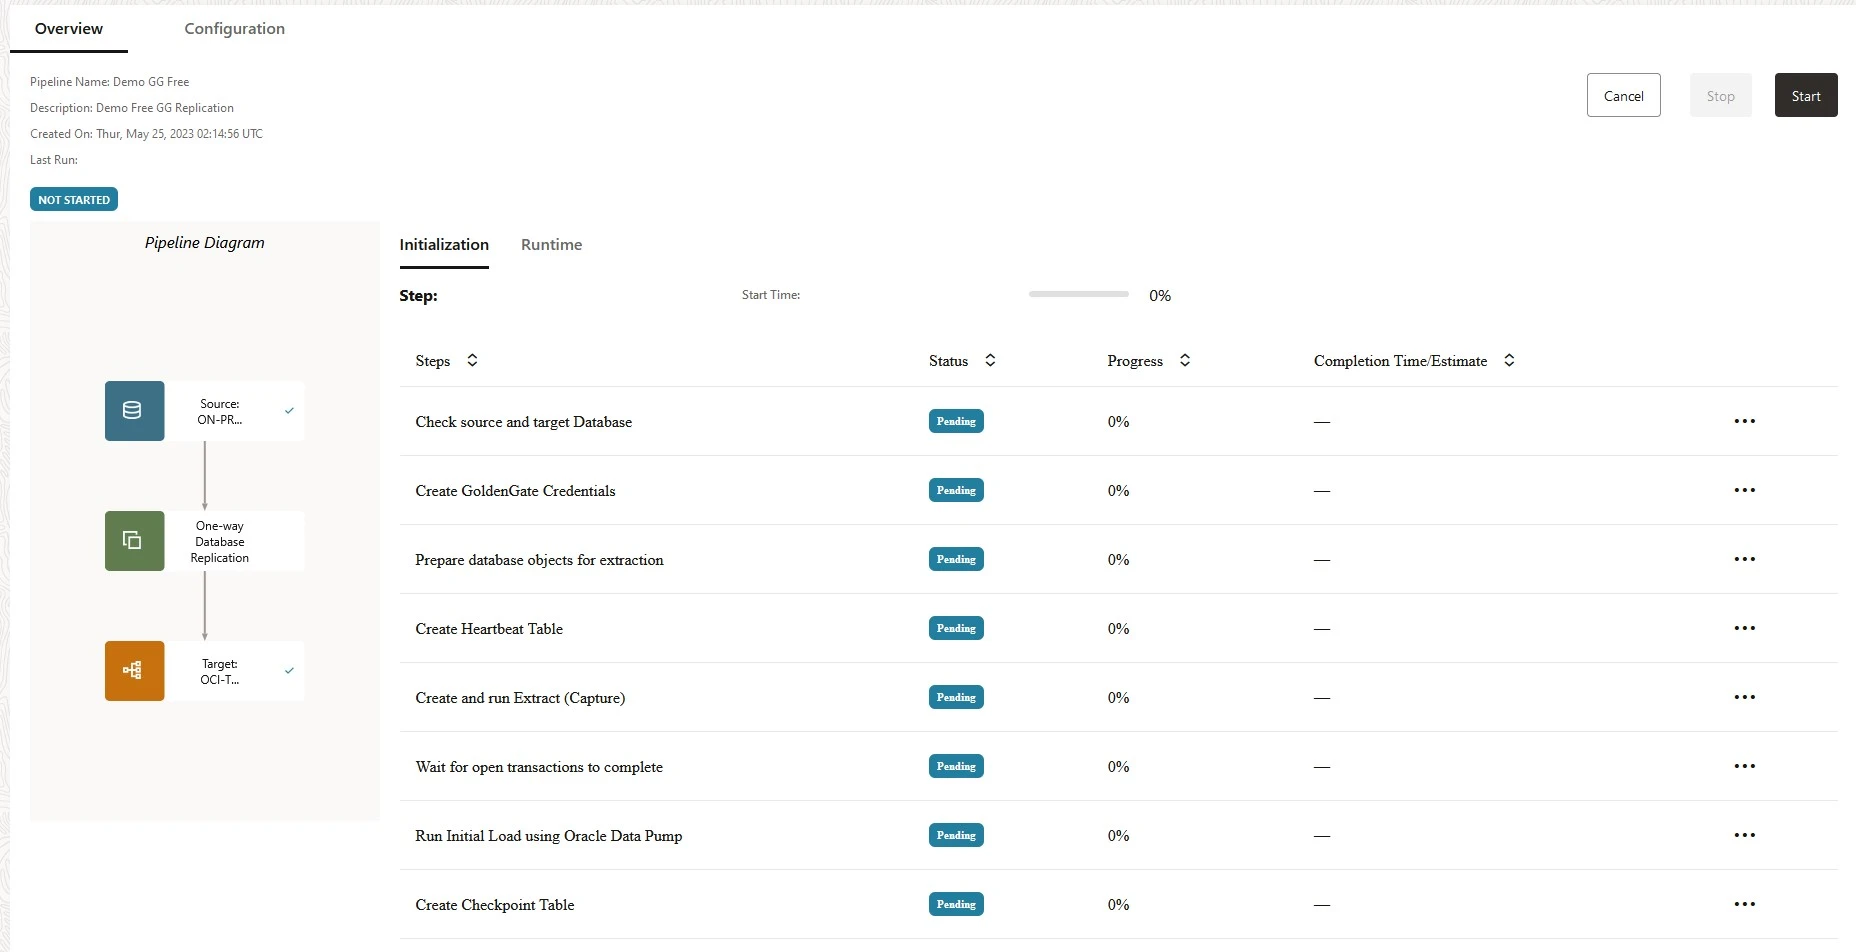
Sample Screenshot initializing the pipeline process.
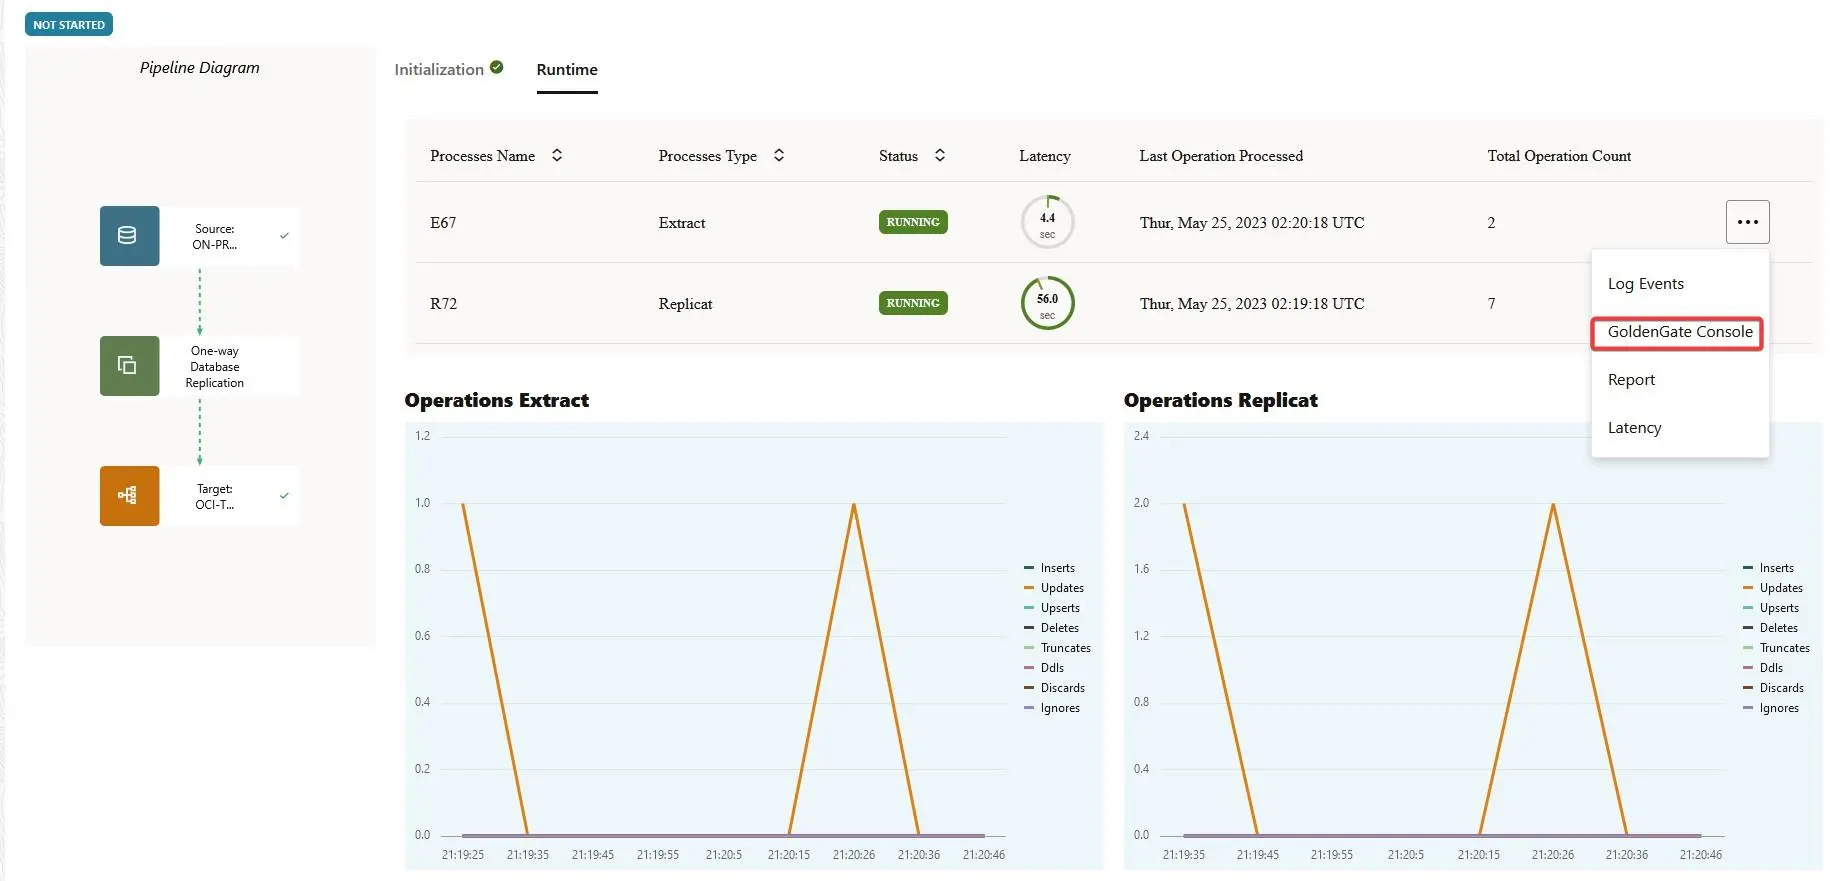
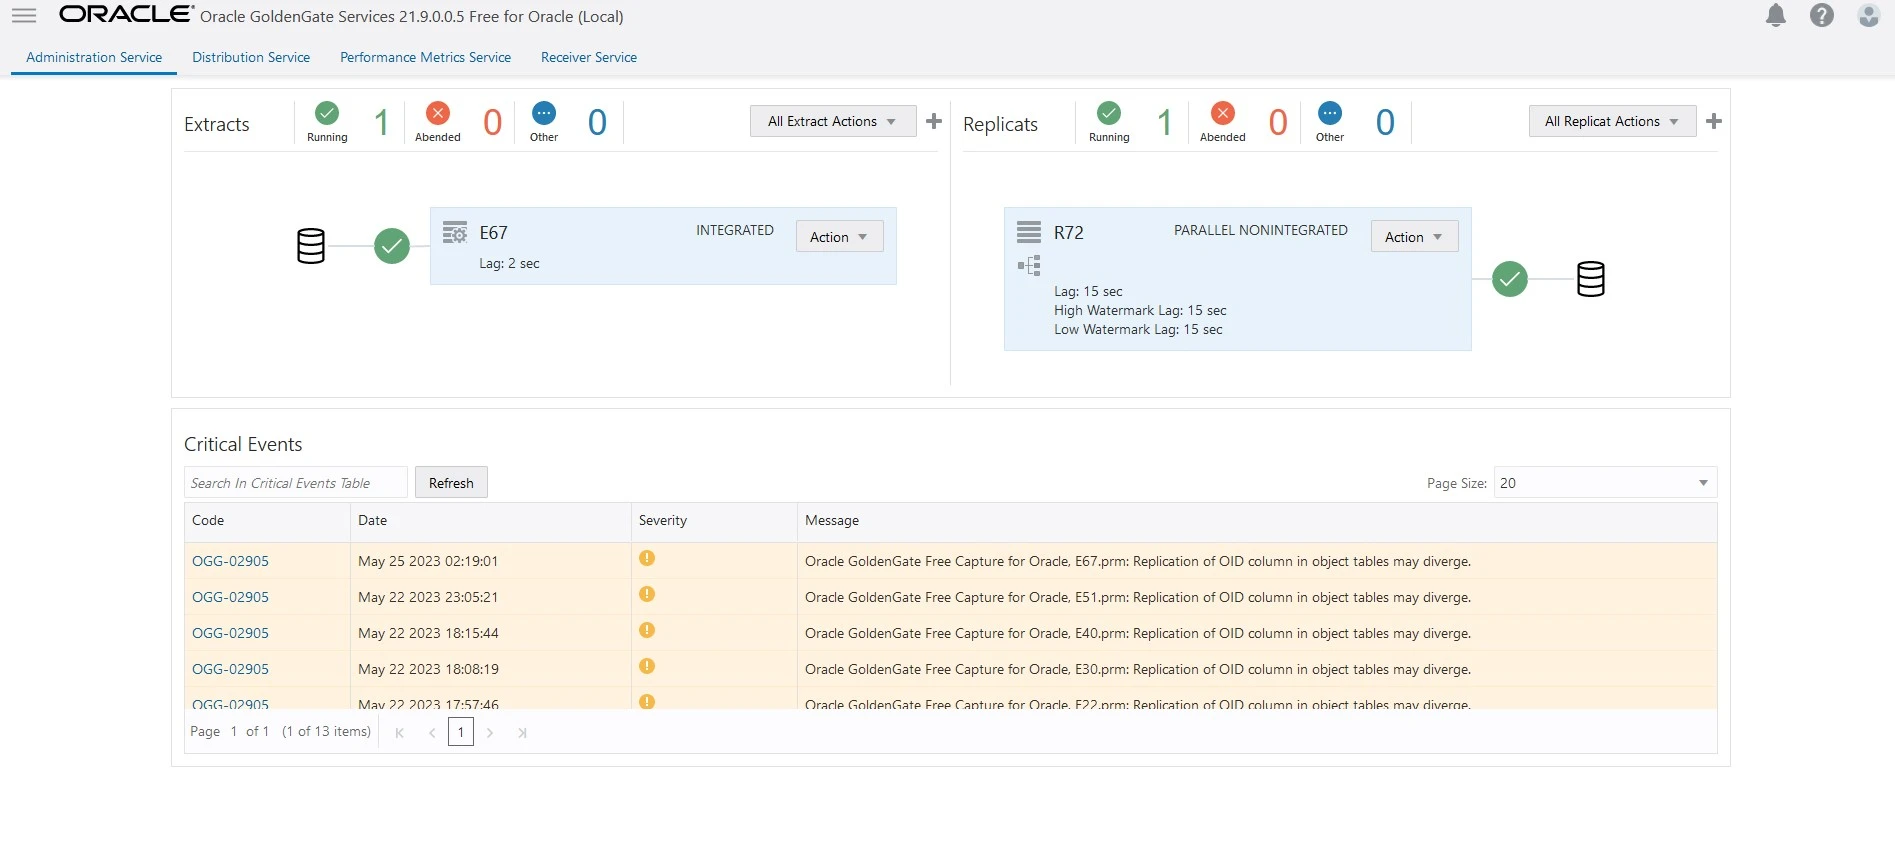
Final Screen shot after successful creation of pipeline. Once the Extract and Replicat gets created you can open the GoldenGate Console.
GoldenGate Microservices console to edit and adjust the parameter if required.
SUMMARY
In this article, we demonstrated on how to create GOLDENGATE FREE Connections and Pipeline on OCI for sample Replication.
For more information about GoldenGate Free see the oracle official documentation here.
Hope you found this article useful.
Disclaimer: The views expressed on this document are my own and do not necessarily reflect the views of Oracle.
For more information about GoldenGate Free see the oracle official documentation here.
Hope you found this article useful.
Disclaimer: The views expressed on this document are my own and do not necessarily reflect the views of Oracle.