OCI GoldenGate Access using Public Load Balancer
This blog post (GoldenGate Access Using Load Balancer) will guide you through the process of configuring a public load balancer to reach the OCI GoldenGate instance that has been provisioned within a private subnet. By utilizing the public IP of the load balancer, you will be able to access the GoldenGate microservice UI page through your web browser.
Frequently, customers request us to set up GoldenGate and Databases in a private subnet, limiting access to specific CIDR/IP ranges. When setting up an OCI GoldenGate deployment, there is an option to enable or disable the deployment’s public endpoint. However, since the public endpoint is managed by the OCI GoldenGate service tenancy, customers cannot create network security group (NSG) rules from their own tenancy.
Frequently, customers request us to set up GoldenGate and Databases in a private subnet, limiting access to specific CIDR/IP ranges. When setting up an OCI GoldenGate deployment, there is an option to enable or disable the deployment’s public endpoint. However, since the public endpoint is managed by the OCI GoldenGate service tenancy, customers cannot create network security group (NSG) rules from their own tenancy.
Architecture
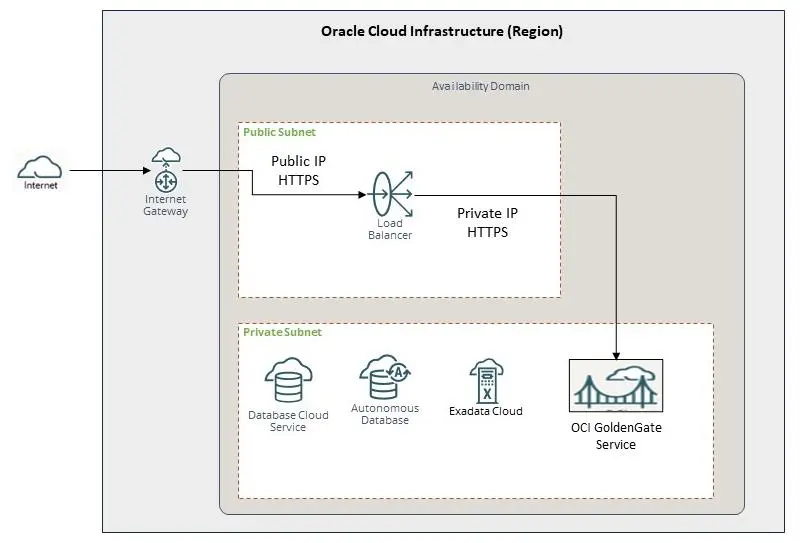
Pre-Requisites:
- The Virtual Cloud Network (VCN) with both public and private subnets has already been established
- The private subnet is configured to permit traffic from the public subnet.
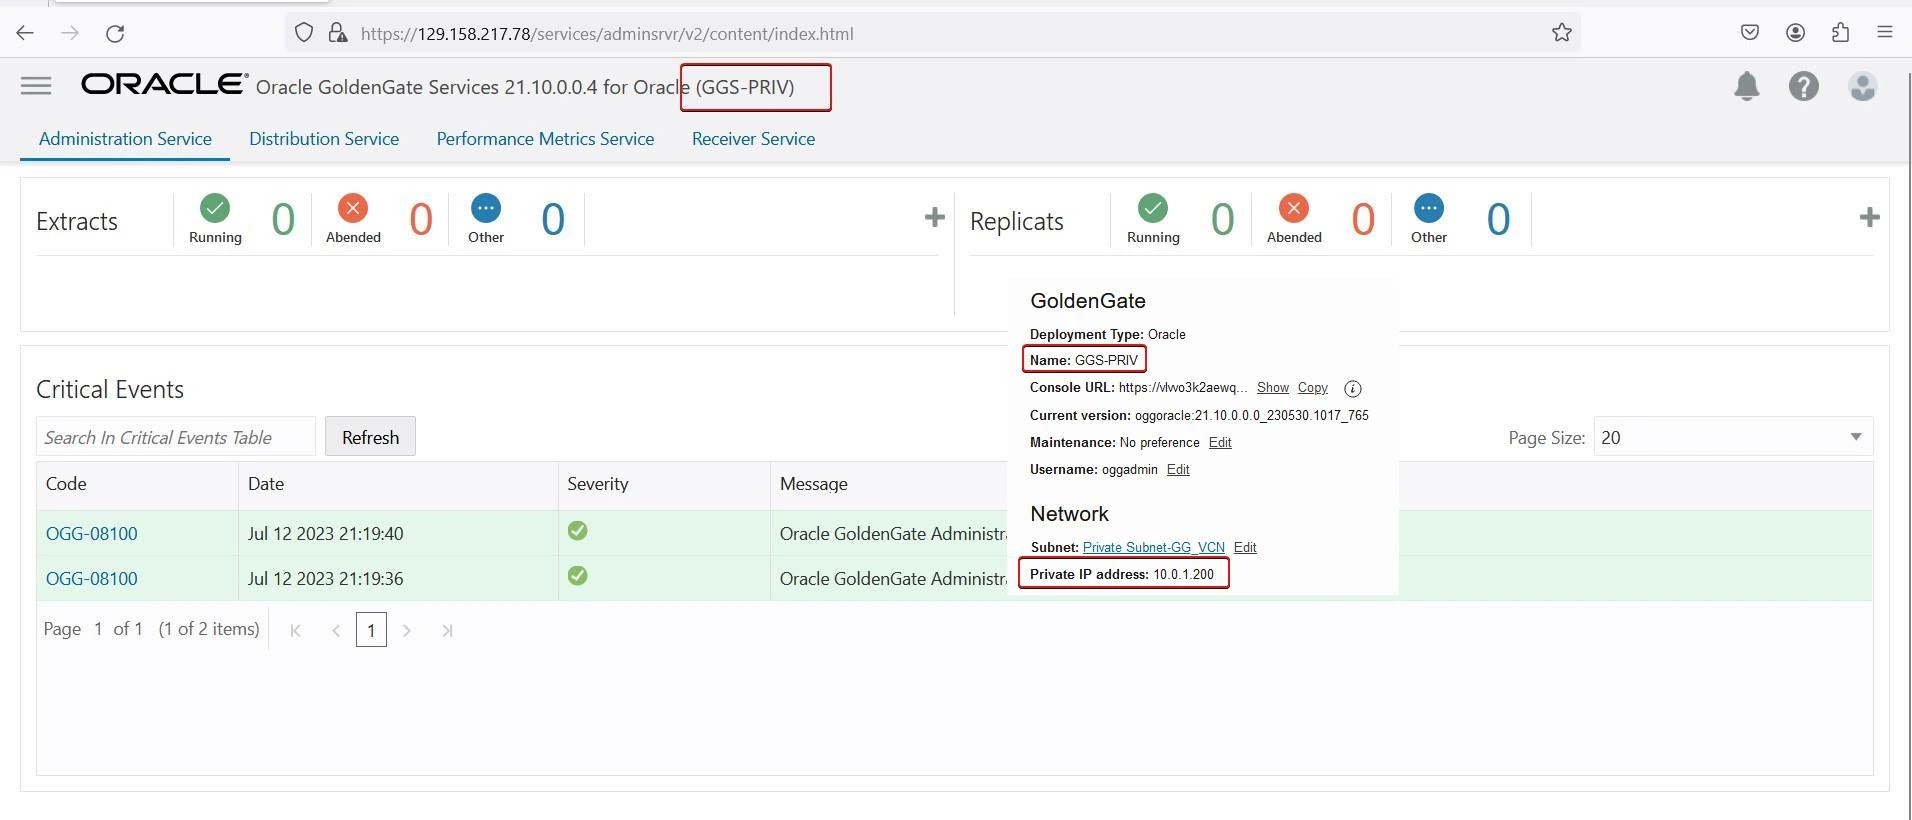
- OCI GoldenGate Service Deployment has already been provisioned in Private Subnet.
Sample Screenshot of OCI GoldenGate Service Provisioned in private subnet.

Create Public Load Balancer
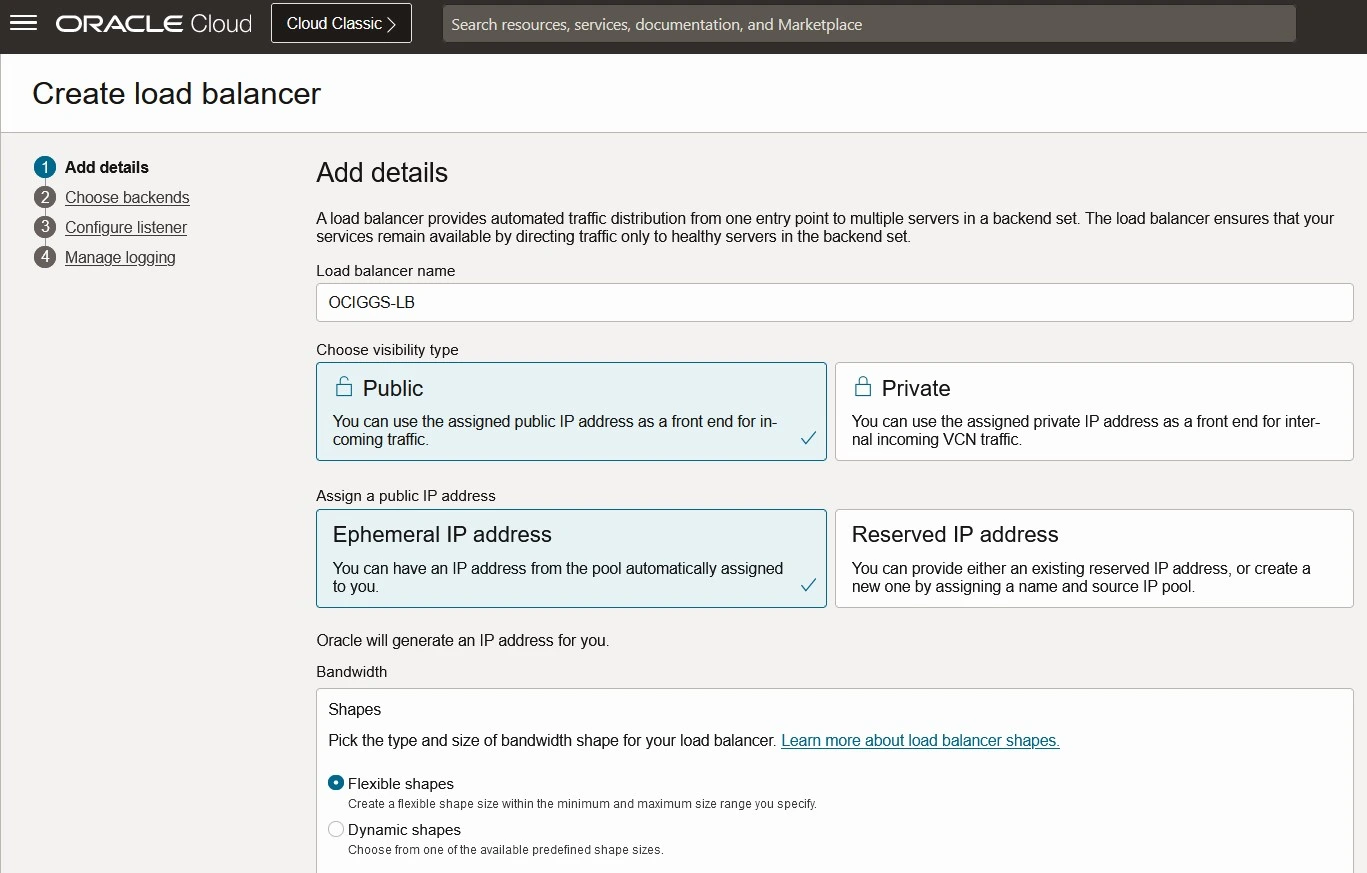
To setup Load Balancer, go to Networking → Load Balancer → Create Load Balancer.
Specify a name to the load balancer – In this case its is OCIGGS-LB
Select Visibility type Public and Assign public IP address
Specify a name to the load balancer – In this case its is OCIGGS-LB
Select Visibility type Public and Assign public IP address
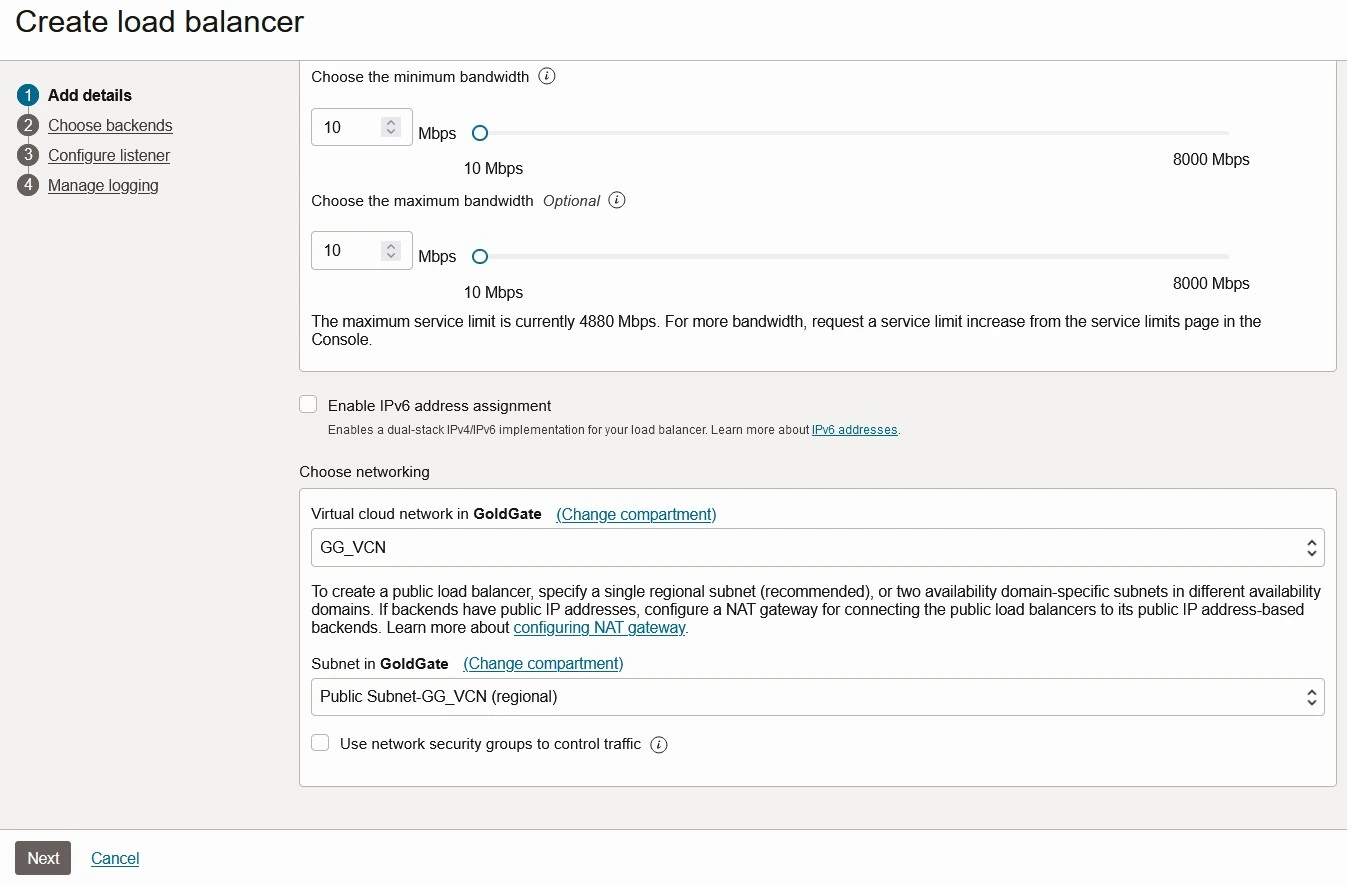
Select the Load Balancer Shape. I will opt for the Flexible Shape and the default bandwidth.
Additionally, pick the VCN and Public Subnet where the Load Balancer should be created.
Finally, click on “Next” to proceed.
Additionally, pick the VCN and Public Subnet where the Load Balancer should be created.
Finally, click on “Next” to proceed.
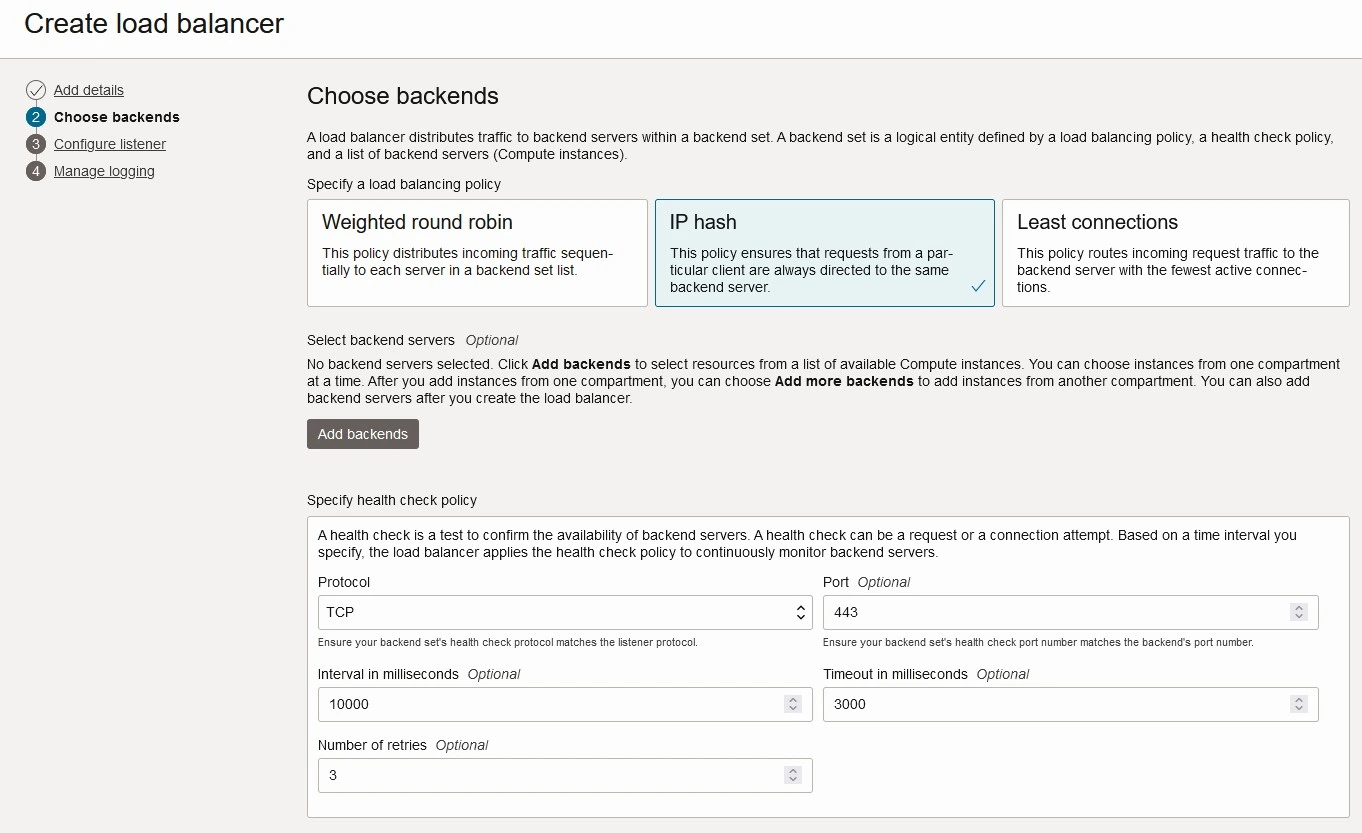
Choose the load balancing policy for GoldenGate, I have selected IP Hash.
On the next screen, update the Health Check policy with TCP:443.
Currently, there is no need to add any backends. We can add them later.
On the next screen, update the Health Check policy with TCP:443.
Currently, there is no need to add any backends. We can add them later.
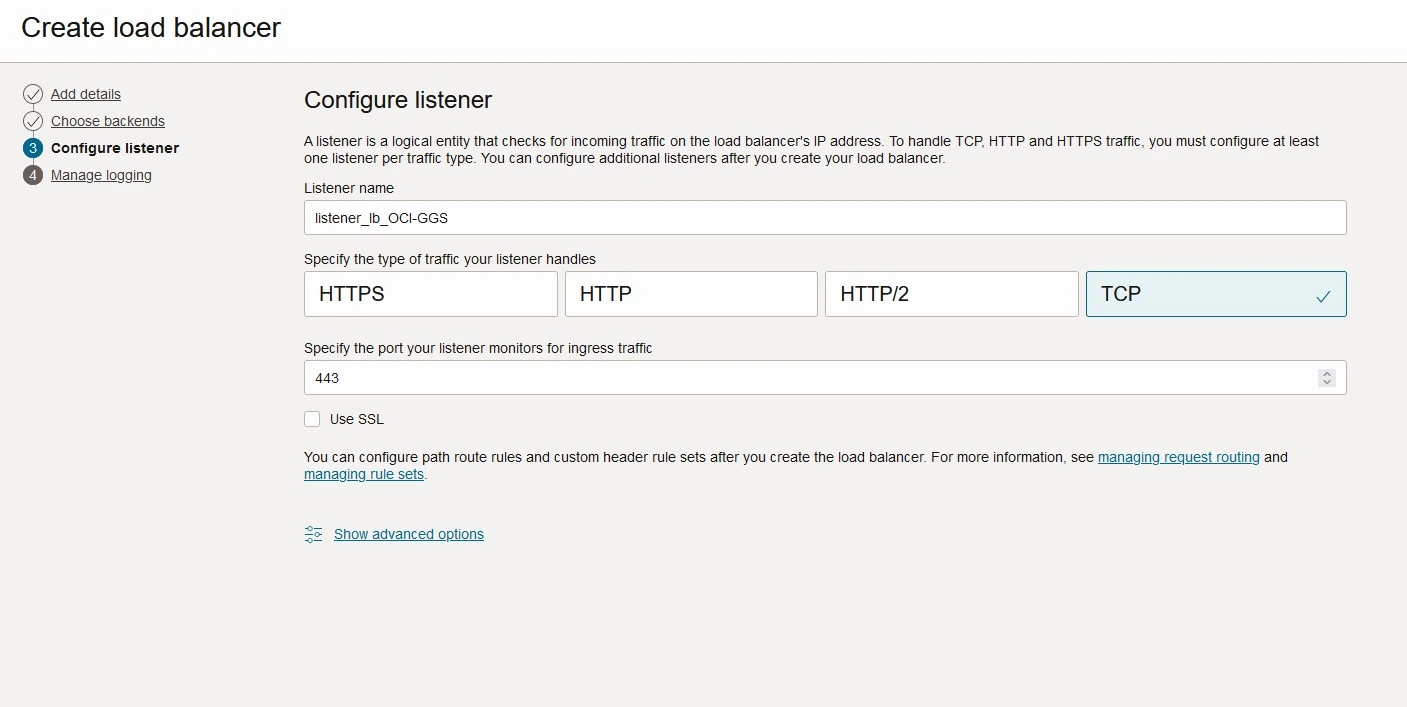
Configure and set the Protocol as : TCP
Port for Listener as : 443
Port for Listener as : 443
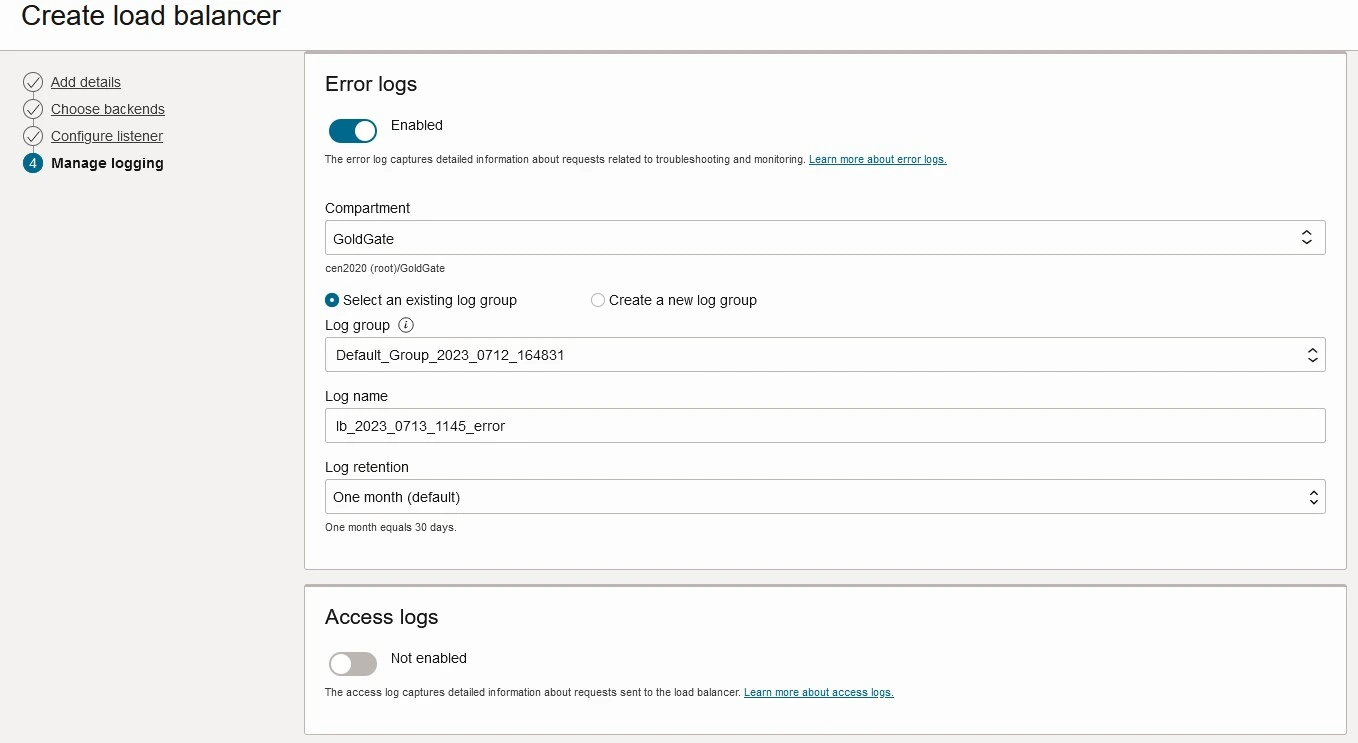
Enable or Disable the Error Logs based on your requirement.
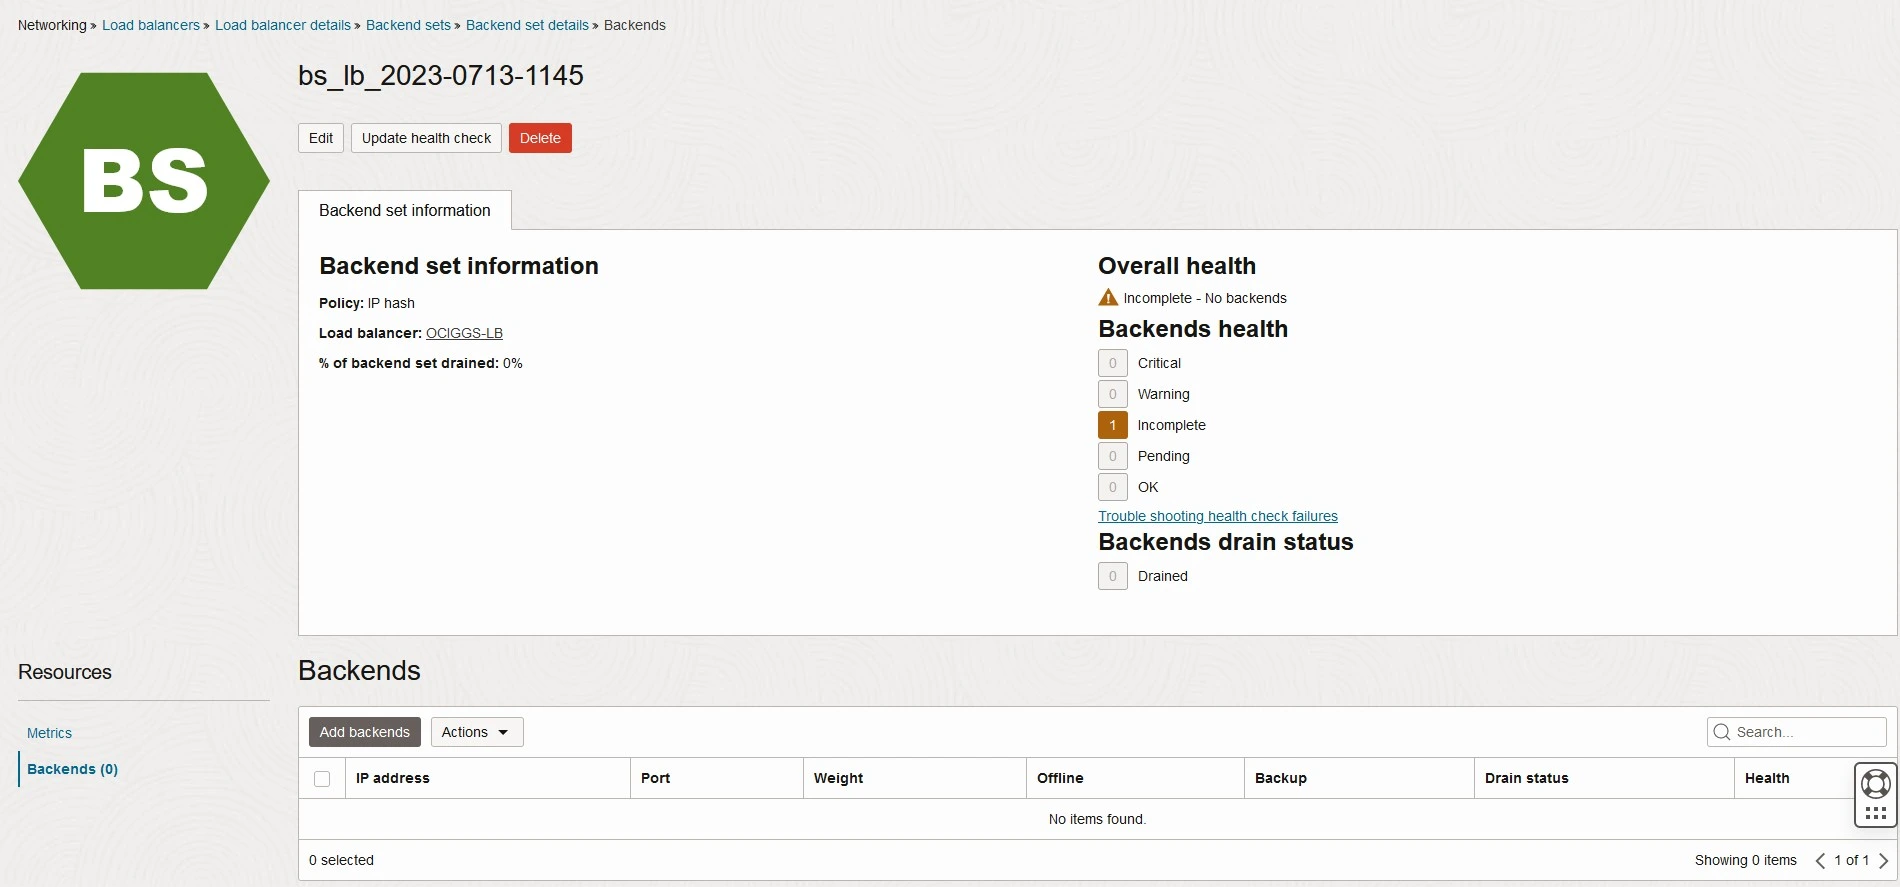
Create Backend for Load Balancer
The Load Balancer has been created without a Backend, resulting in an incomplete state for your Load Balancer. Hence lets add the Backend to the load balancer.
Networking -> Load balancers -> Load balancer details -> Backend sets -> Add Backends
Networking -> Load balancers -> Load balancer details -> Backend sets -> Add Backends
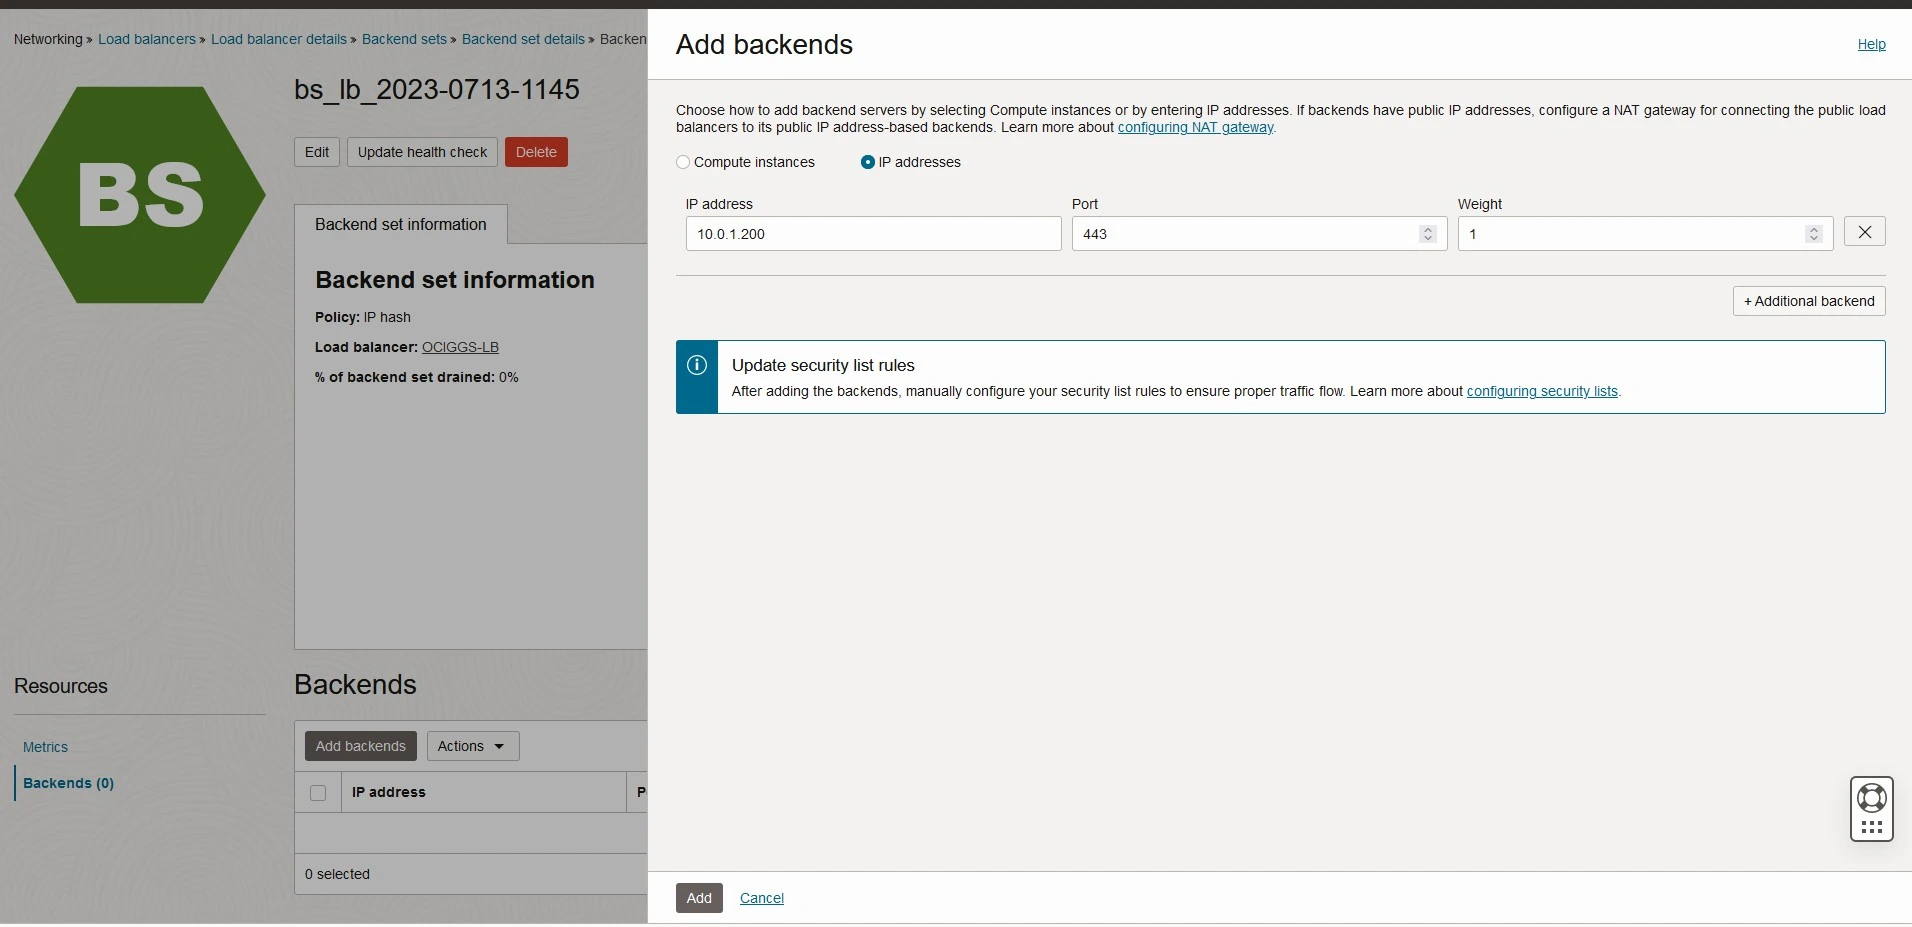
Select the Backend as IP Address and provide the IP Address of the OCI GoldenGate Service that is provisioned in the private subnet, with the port set to 443.Click on “Add” to finalize the addition of the backend to the Load Balancer.
In this case the private IP is : 10.0.1.200
In this case the private IP is : 10.0.1.200
The provisioning of the OCI Load Balancer and the addition of the Private OCI GoldenGate service as its backend are now complete.
In next few minutes, both the Load Balancer and its backends should have a health status of “OK”.
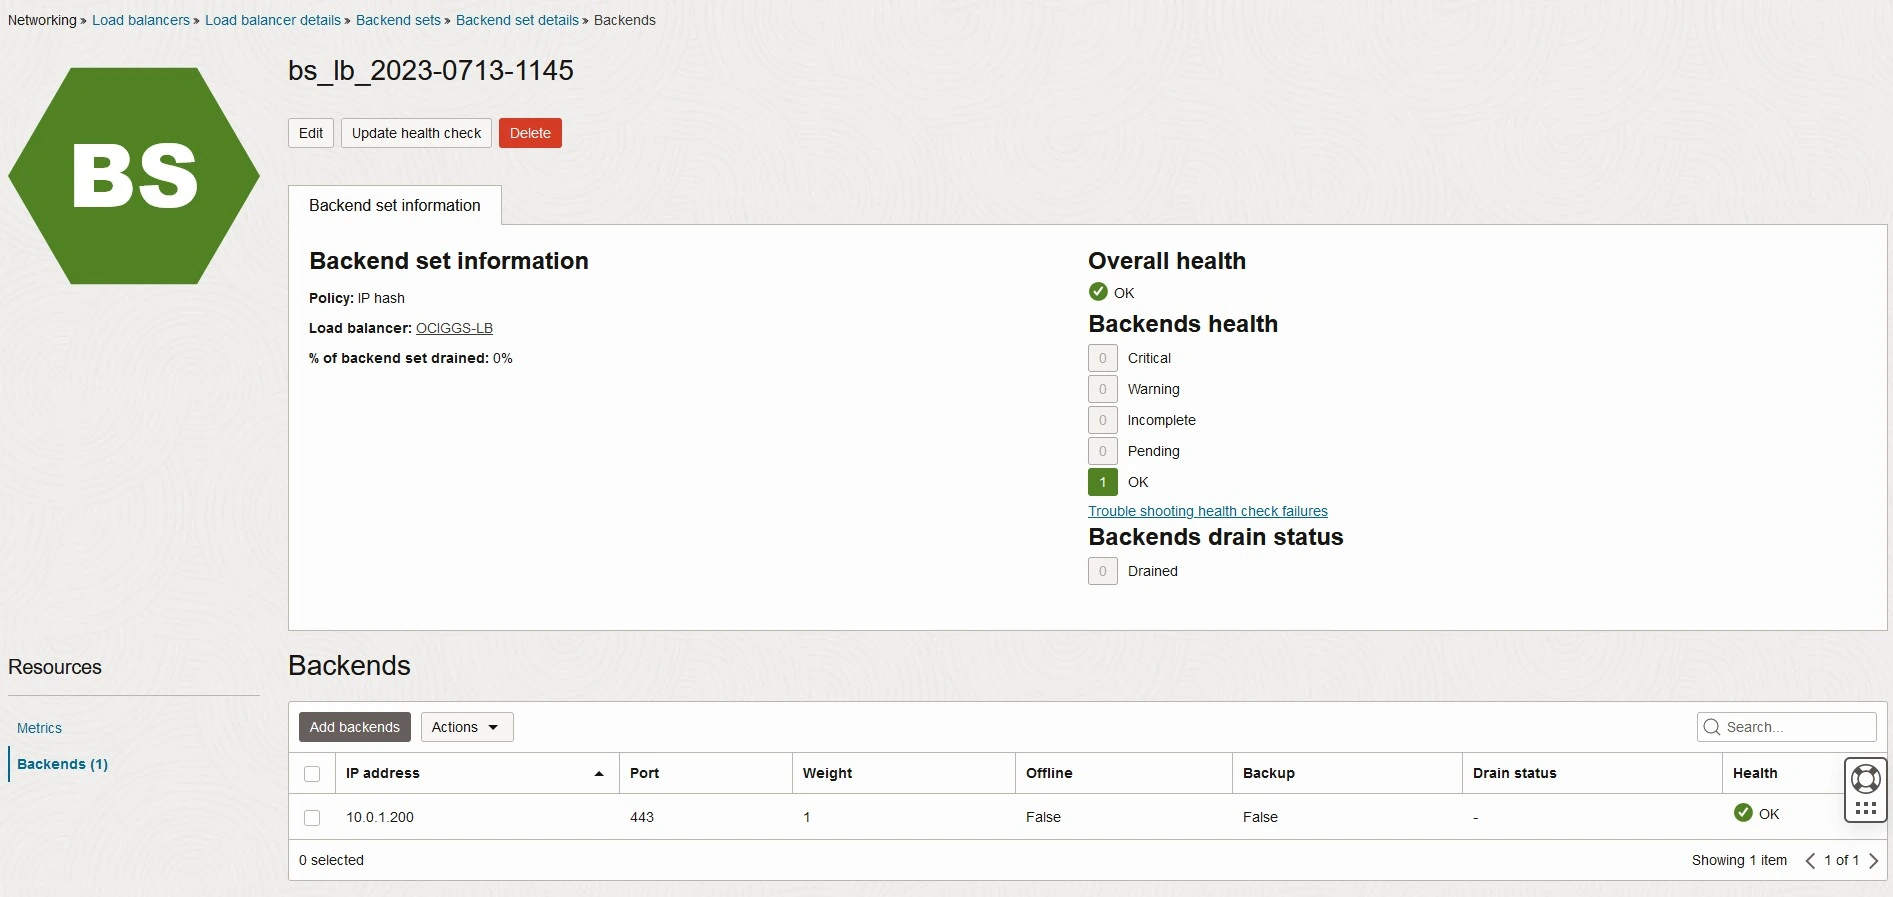
Lets look at the final Screen of Load Balancer after adding the Private IP of OCI GGS in Backend.

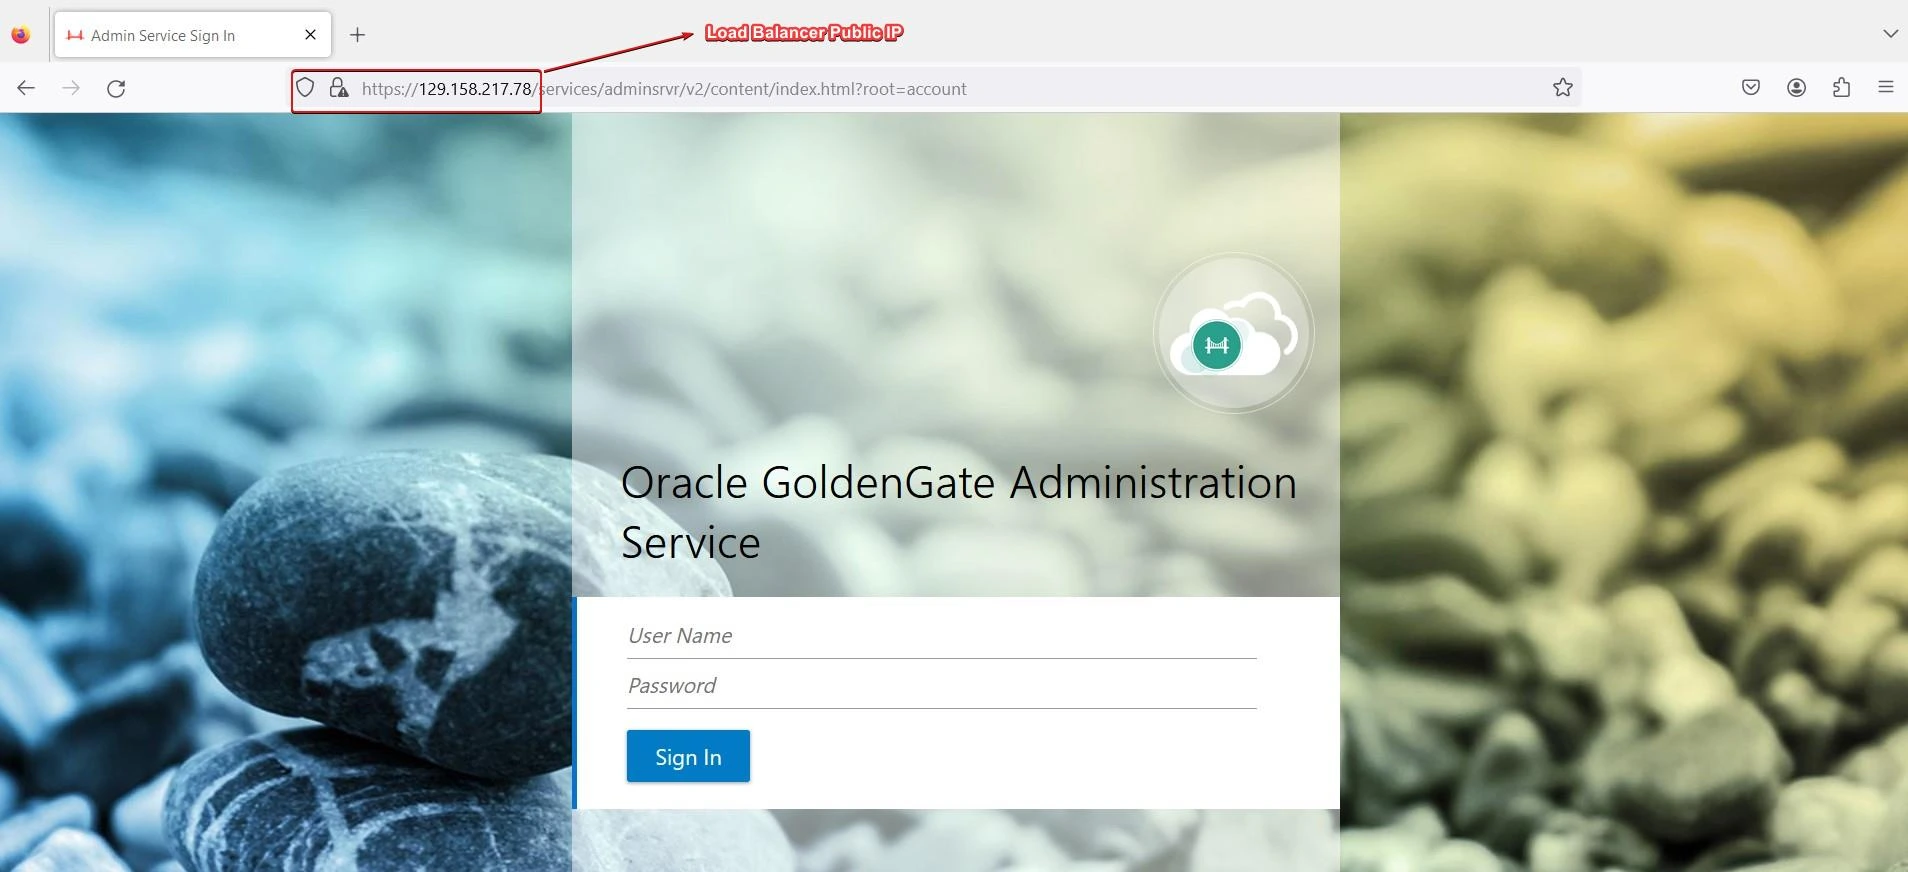
Now Connect Private OCI GGS using Public Load Balancer IP
Public Load Balancer IP is : https://129.158.217.78
Public Load Balancer IP is : https://129.158.217.78
SUMMARY:In this article, we demonstrated on how to connect to OCI GoldenGate Service that has been provisioned on private subnet using Public Load Balancer.
For more information about about GoldenGate Access Using Load Balancer please see the oracle official documentation here.
Hope you found this article useful.
Disclaimer: The views expressed on this document are my own and do not necessarily reflect the views of Oracle.
For more information about about GoldenGate Access Using Load Balancer please see the oracle official documentation here.
Hope you found this article useful.
Disclaimer: The views expressed on this document are my own and do not necessarily reflect the views of Oracle.